How To Start & Maintain A Clabber Culture For Cheesemaking
Learning how to make a clabber culture for cheesemaking is simple and easy. A clabber culture is the same for cheesemaking as a sourdough starter is for bread making. It’s also made in a very similar way to a sourdough starter. Cheese making started out as a way of preserving milk especially when there is an over abundance of milk. Learning to make cheese the old-fashioned way will not only give you the best tasting cheese, but a feeling of satisfaction as you learn how to make cheese using traditional methods.

What Is A Clabber Culture?
When you make cheese, you have to add a culture to the milk to develop the flavor in the cheese. Nowadays you can purchase freeze-dried starter cultures for use in cheesemaking. Different recipes call for thermophilic (high temperature) or mesophilic (low temperature) cultures. In the old days, before there was freeze-dried cultures, people would make a clabber culture and use that to culture their cheese. The amazing thing about a clabber culture is you can use it to culture ANY cheese recipe. It works for recipes that call for thermophilic as well as mesophilic cultures. Depending on how warm you get the milk, and the process you follow when making the cheese will determine whether the thermophilic bacteria or the mesophilic bacteria in the clabber reacts upon the milk and flavors the cheese. Only dealing with one fresh culture called clabber not only saves you money because you don’t have to buy any freeze dried cultures, but also gives you better tasting cheese. Once you taste cheese that is made with clabber culture, you will never want to go back to eating cheese made with freeze dried cultures.
Old Fashioned Cheese Making
Cheese making is an old-fashioned skill that has been past down through many generations. You may remember your Grandma keeping a jar of sour milk on her counter that she would use for different things in her kitchen. That was a clabber culture!
If you’ve ever read The Little House On The Prairie Books, you know that in the summertime when there was lots of milk, was when Ma made cheese. She didn’t have access to freeze-dried cultures, or boughten rennet (used to coagulate the cheese). She also didn’t have a clabber culture in her refrigerator or freezer because she had neither. If they hadn’t had fresh milk in awhile, she wouldn’t have had a clabber culture on her counter either. So how did she make cheese for her family? Simple. As soon as their cow freshened (had her calf), she would take some milk and put it into a jar on her counter. Allow it to thicken and then discard and feed it every day. In a few days, she would have the culture she needed to be able to make cheese. She probably made rennet from wild plants like nettles or vegetables, more on that another time.
This is how she made cheese for her family using nothing but the fresh raw milk right from the cow. You can do the same thing by learning how to start and maintain your own clabber culture.
Raw Milk
Clabber culture has to be started with raw milk, although it can be maintained with pasteurized milk. The reason for this is because raw milk is full of beneficial bacteria that when allowed to take it’s natural course becomes a soft cheese. When baby calves drink their Momma’s milk, it turns into cheese in their stomach during the digestive process and gives them the nutrition that they need to grow. The stomach of a baby calf also contains rennet, which is something else we add to milk to get it to coagulate when making cheese. So when we make cheese, we are basically just allowing the milk to follow it’s natural course, except that we steer that course by how we manipulate the milk which determines what kind of cheese we end up with.

Raw milk is one of the healthiest foods on the planet and shouldn’t be pasteurized if at all possible. Pasteurization is the process of heating the milk which kills any bad bacteria present in the milk. It also kills all the good bacteria, enzymes, and probiotics that help you digest the milk and boosts your immune system. Many people that are “lactose” intolerant can digest raw milk just fine, and those that still experience some sensitivity can usually eat cultured dairy without any issues. You can also look for milk from cows that have the A2/A2 gene, meaning they do not produce lactose in their milk. I’ll write more on that another time.
My Experience
I’ve been milking dairy cows for the last fifteen years and in that time I’ve learned a lot about dairy cattle. I’ve learned how to make all of our dairy products including all of our hard cheeses. This has made a big difference in our grocery bill and has kept our family healthy and thriving. Having a family dairy cow is a lot of responsibility, but the rewards are so worth it! When learning about dairy cows, or any new homesteading skill, I suggest that you take it slow and learn one or two things at a time so it’s not so overwhelming. There’s lots to learn, but I’m here to help you and make it easier for you!

I have drank raw milk for over 15 years now, fed it to all of my children, and drank it through all five of my pregnancies. We are rarely ever sick, and I know part of the reason for that is that our digestive systems are healthy because of consuming raw dairy. The risk of getting e coli or listeria from raw milk is extremely low compared to all of the benefits of leaving milk raw. Also, if you source your milk from a small farm or better yet, have your own family milk cow, you know exactly where your milk comes from.
We handle the milk carefully, being sure to chill it as soon as possible after milking, and straining it to remove any impurities. This takes away almost all of the risk from any bad bacteria that may be present in the milk. It’s also important to note that a normal healthy digestive system (from consuming raw dairy and other probiotic rich foods) will not fall prey to bad bacteria nearly as easily as an unhealthy digestive system. People consumed raw milk without any problem for thousands of years.
Cultured Dairy
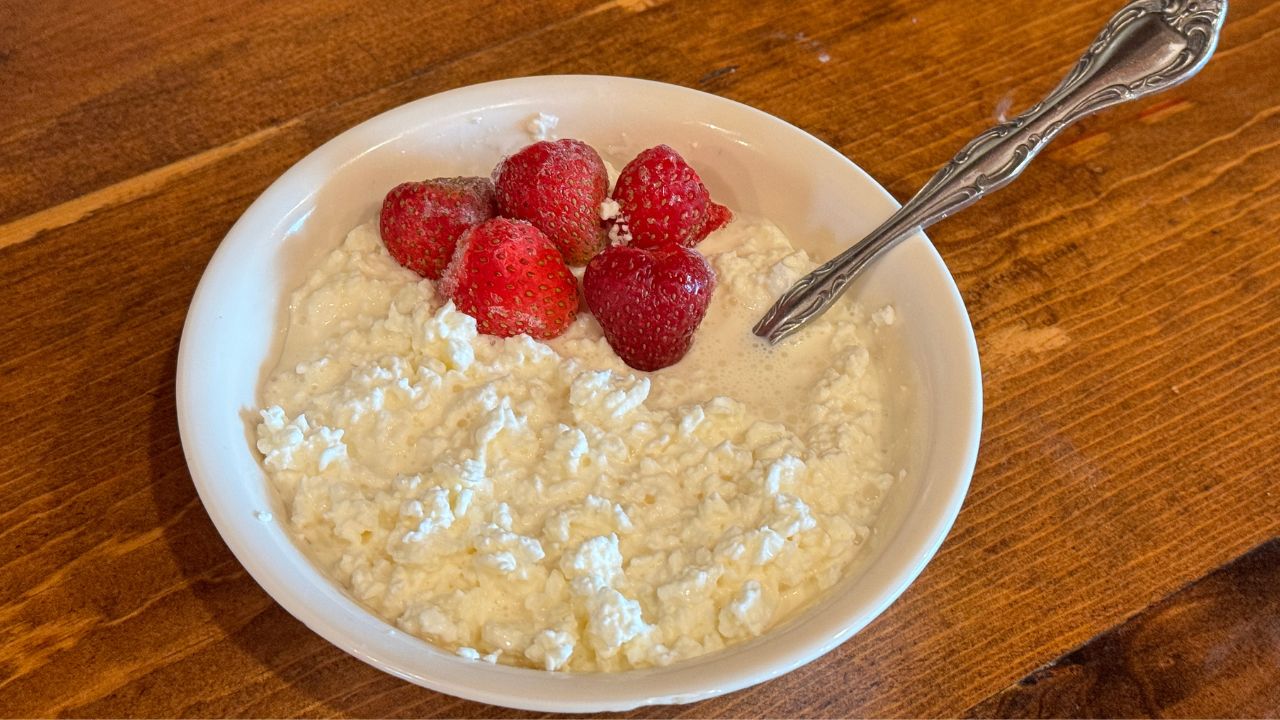
Cultured dairy products are made from raw milk that has been coagulated either by letting it set out at room temperature until it gets thick, or by adding some kind of a culture, which just speeds up the process, making it thicken more quickly. Pastuerized milk can also be used to make cultured dairy products, but you must add a culture to it (like clabber or yogurt) to get it to culture or thicken. This is because the natural good bacteria is killed during the pasteurization process. Examples of cultured dairy include cottage cheese, yogurt, milk kefir, sour cream, buttermilk, and other cheeses made with a culture, like clabber, kefir grains or yogurt. The probiotics, vitamins, minerals and beneficial bacteria naturally present in raw milk greatly increase when the milk is cultured. You’re probably familiar with how much eating yogurt will help your digestion, and that is because it is a cultured dairy product.

When dairy is cultured, the bacteria that we add to the milk (i.e. clabber or yogurt culture) breaks down the lactose in the milk. It also produces lactic acid which lowers the PH of the milk, and increases the available nutritional benefits. Culturing raw dairy also prolongs its shelf life, for example yogurt will last longer in the refrigerator than milk. Adding cultured dairy to your baked goods in place of milk or water, gives the yeasts (either regular yeast or sourdough) something extra to feed on, and will give you a very beautiful bread.
Basics Of Clabber Culture
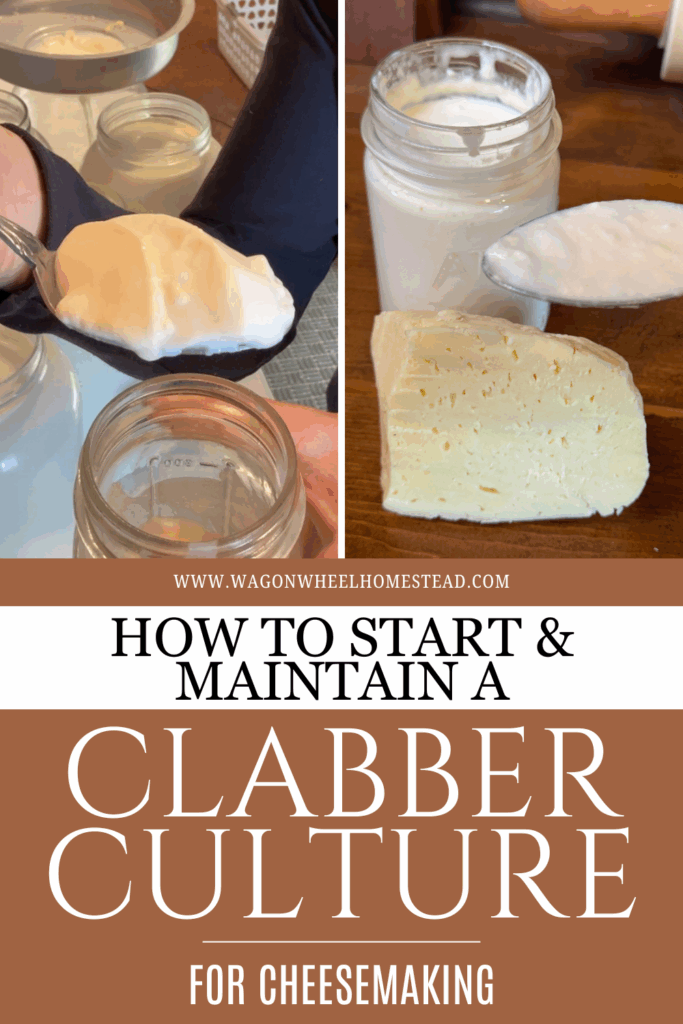
Clabber is formed by allowing a small amount of raw milk to ferment naturally at room temperature. The natural bacteria and enzymes produce a thick consistency and tangy flavor (just like the fermentation process that happens when you make a sourdough starter). This process usually happens within one or two days. Then we take a small amount of that thick cultured milk, put it into a new jar and feed it fresh milk. Over the period of a few days of feeding it like this, the clabber culture will strengthen and the flavor will improve. Once it’s thickening within a few hours of being fed, it will be strong enough to use in cheesemaking. Clabber makes great sour cream, cottage cheese, cream cheese, mozzarella, and aged cheese like farmhouse cheddar, asiago, gouda, and the list goes on.
Find my simple recipe for how to make raw cottage cheese using your clabber culture, click here.
Clabber Culture Discard
When you feed your clabber culture, you will want to either discard some of your culture to a separate jar, or remove a little bit and add it to a new jar before feeding it fresh milk. This is the exact same principle that we use when feeding a sourdough starter. The ratios for feeding a clabber culture are 1 part clabber to 50 parts milk. I use 1 Tablespoon of clabber and feed it 1 pint or 2 cups of fresh milk each time I feed my clabber culture.

How To Use Clabber In Cheesemaking
When you make cheese, you’ll add ¼ cup of clabber per gallon of milk in your recipe. The lactic bacterias in the clabber culture will replace any freeze-dried culture that your cheese recipe calls for. What you’re basically doing by adding the clabber culture to your cheese is turning one whole pot of milk into clabber. Then you decide what type of cheese you'll make by manipulating it according to the recipe which allows either the thermophilic or mesophilic bacterias in the clabber to take over the cheese. It really is quite amazing!
FAQ
The discard from your clabber culture can be used in any baked good that calls for milk or water. I use it to make sourdough sandwich bread weekly. You can also add it to any casserole just like mushroom soup and it will bake up beautifully. Add it to smoothies, salad dressings, or as a replacement for sour cream or yogurt in recipes. Clabber can be eaten plain just like yogurt as well.
Fresh clabber has a mild and delicious taste. If allowed to over ferment, it will start to taste sour, just like a sourdough starter will be more sour if allowed to sit out to long. Raw milk actually doesn’t rot, and it doesn’t ever have a sour nasty taste and smell like pasteurized milk that is left out of the refrigerator to long without a culture being added to it. Raw milk will just slowly turn into cheese, and although you may not want to eat or drink it after a few days of it setting out, it probably wouldn’t hurt you. Having said that, a well established clabber culture that is fed regularly will have a very pleasant taste (not sour), and will impart that same flavor to your cheese.
Yogurt is made with a culture that only has one or two specific microorganisms in it. This means that the yogurt will have a thick smooth texture, and a predictable tangy flavor. Clabber has many different strains of good bacteria and microorganisms in it from the raw milk, so it will have a different flavor than yogurt. Yogurt cultures came from clabber cultures of long ago, but over time the yogurt cultures have been isolated down to one or two microorganisms that consistently make it taste like "yogurt".
If you are going to be away, or aren’t going to be making cheese, you can put your clabber culture into the refrigerator for up to a week. Once a week it’s a good idea to take it out, feed it and then you can put it back into the refrigerator after it has cultured. You don’t want to make cheese with clabber culture that has been in the refrigerator because the bacteria in it won’t be at the right stage to culture your cheese.
Just like a sourdough starter, you’ll want to take it out of the refrigerator and feed it at least twice before making cheese. So if you’re in the cheesemaking season, just keep it on your counter and feed it daily. Then you’ll always be ready to make cheese when you’re overwhelmed with milk. There are so many uses for clabber culture discard, that it’s really not a waste to be feeding it everyday. That’s how our Grandma’s did it, and we can do it too.
You can also freeze clabber culture in an ice cube tray and then store in an airtight container in the freezer for up to three months. Just allow it to thaw naturally, and feed it a couple of times before using it to make cheese.
Your cheese is a direct reflection of the health of your clabber culture. If your clabber culture is well fed and cared for, and fed on a regular basis, it will make your cheese taste amazing. But if you forget to feed your clabber culture, and it sits out on your counter too long, it can develop a yeasty flavor, which will also carry over into your cheese.
You want to make sure you are using your clabber culture for cheese making before any bubbles start forming on the inside of the glass. That means that the bacteria has consumed the lactose in the milk and is now starting to get hungry, or over ferment. Very similar to a sourdough starter. You want to make bread with your sourdough starter when it’s at it’s peak rise, and for a clabber culture, you want to use it after it has coagulated, but before you start to see bubbles on the side.
If you do see bubbles form on the inside of your jar, it needs to be fed again before using it to make cheese. Just take some out, put it in another jar and feed it some fresh milk. Once it has set, you can use it to make cheese. Put the rest of the discard in the refrigerator and use in cooking or baking as usual.
After feeding your clabber culture fresh milk, it will take 12 to 24 hours before it is cultured and ready for use in cheesemaking. If you feed it warm milk and your house is warm, it will probably be ready to use in 12 hours. I keep my clabber culture in a cooler part of my house, where I strain my milk every morning, so it usually takes it about 24 hours before it’s fully cultured even after feeding it warm milk. It’s easy for me to remember to feed it, because when I strain my milk every morning I feed my clabber culture and then it’s always ready to make cheese. This also works well because I usually start my cheesemaking in the morning, and that’s when my clabber culture is ready.
You can use either whole milk or skim milk for feeding your clabber culture. If you use whole milk, you will notice the cream that naturally rises to the top of the milk will also be cultured. This is sour cream. You can skim it off and store it separately for use as sour cream, or just keep it with your clabber discard.


Tips For Making Your Own Homemade Clabber Culture
- Just like a sourdough starter must be well fed and healthy in order to make good bread, a clabber culture must also be well cared for in order to make good cheese. If your clabber culture tastes yeasty, sour or has an off taste, your cheese will taste the same. Take good care of your clabber culture and it will make the best tasting cheese.
- Similar to how sourdough rises and falls, your clabber culture follows of cycle of fermentation and coagulation. The difference is that your clabber culture doesn’t rise like sourdough does, so it can be harder to tell where it’s at in it’s cycle. You’ll know it’s at it’s peak in the cycle when it has coagulated, but there are no bubbles forming on the inside of the jar.
- I like to keep my clabber culture in a glass jar, so I can easily see what it is doing. If you see bubbles forming, or if it has started to separate into curds and whey, you’ll know it is past it’s peak and is starting to overferment. It is still perfectly fine at this point, but not a good candidate for cheese making. It needs to be fed once or twice until it develops a healthy fermentation cycle, and then it will be ready to be used for making cheese.
This post contains affiliate links, which means I make a small commission at no extra cost to you. See my full disclosure here
More Resources About Clabber
How To Start And Maintain A Clabber Culture For Cheesemaking
- Place ½ cup of raw milk into a pint jar. Cover loosely with a cloth and rubber band or leave a lid just setting on the jar. Let it set out at room temperature until coagulated. This can take 2 or 3 days the first time.
2. Once coagulated, take 1 Tablespoon of the clabber and add it to a clean jar. Feed it 1 cup of milk and stir gently. Cover loosely and allow it to set out at room temperature until it coagulates. This might happen in as little as 24 hours this time. Put the discard from the first feeding in the refrigerator and use in cooking or baking.

3. Repeat step 2 until the clabber culture has been fed at least 5 times. Then it should be strong enough to use in cheesemaking. Of course, the more times you feed it, the stronger it will be.
If you leave your clabber culture out on your counter, be sure to feed it fresh milk daily. You can keep it in the refrigerator for up to one week between feedings if needed. Clabber culture can also be frozen.

Pin For Later

How To Start And Maintain A Clabber Culture For Cheesemaking
Equipment
- 1 pint jar
Ingredients
- 1.5 cups Raw milk
- 1 tablespoon Clabber culture
Instructions
- 1. Place ½ cup of raw milk into a pint jar. Cover loosely with a cloth and rubber band or leave a lid just setting on the jar. Let it set out at room temperature until coagulated. This can take 2 or 3 days the first time.
- 2. Once coagulated, take 1 Tablespoon of the clabber and add it to a clean jar. Feed it 1 cup of milk (can be raw or pasteurized) and stir gently. Cover loosely and allow it to set out at room temperature until it coagulates. This might happen in as little as 24 hours this time. Put the discard from the first feeding in the refrigerator and use in cooking or baking.
- 3. Repeat step 2 until the clabber culture has been fed at least 5 times. Then it should be strong enough to use in cheesemaking. Of course, the more times you feed it, the stronger it will be.


Can't wait to try this out!