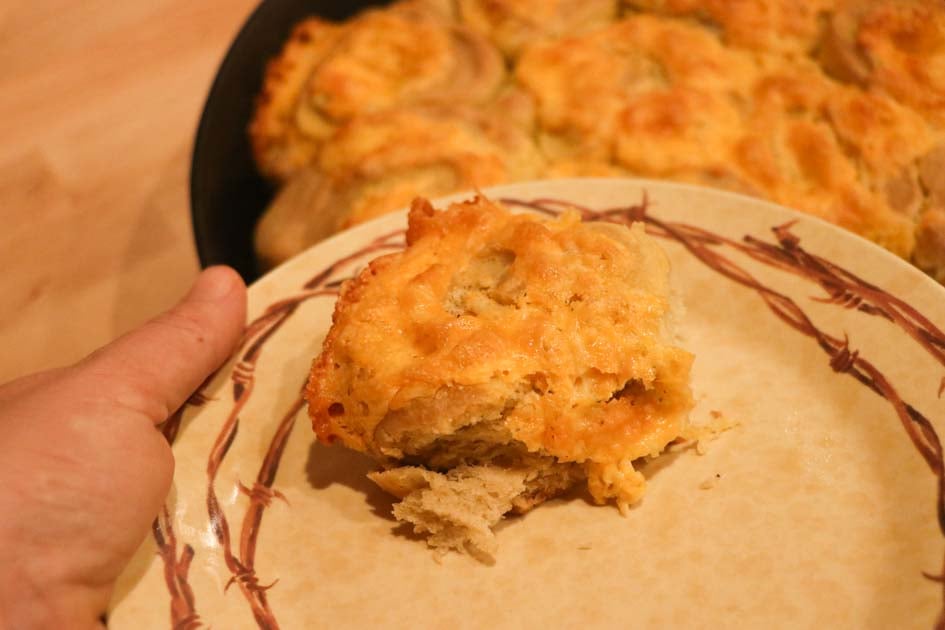
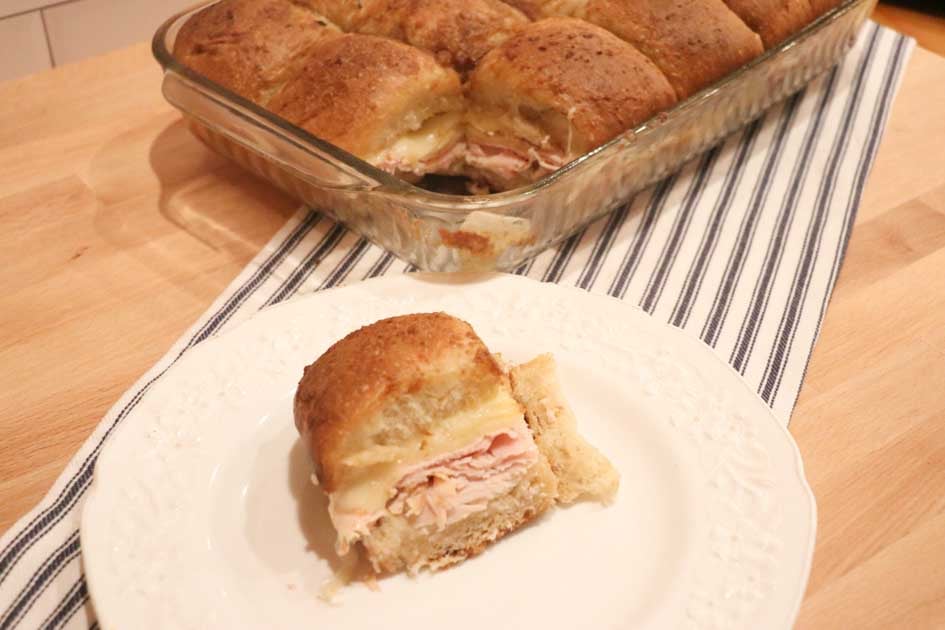
Easy Sourdough Garlic Cheese Rolls
Soft, fluffy rolls stuffed with a creamy blend of garlic, butter, and melted cheese. Warm, rich, and perfectly savory. These rolls are perfect for a Christmas party or to enjoy with your family for supper.
We always make these rolls during the holidays. It seems like we get overloaded with sweets, and it's always nice to have something savory and healthy.
Quick Look: Easy Sourdough Garlic Cheese Rolls
- ⏱️ Prep Time: 15 minutes
- 🍳 Cook Time: 30 minutes (plus 8 hour ferment time)
- 🕒 Total Time: 8 hrs, 45 minutes
- 👥 Servings: 12
- 📊 Calories: ~172 kcal per serving (based on nutrition panel)
- 🔥 Cook Method: Oven-baked in cast iron skillet
- 👩🍳 Flavor Profile: Savory and rich with roasted garlic, melted cheese, and a soft, slightly tangy sourdough base.
- ⭐ Difficulty: Easy – beginner-friendly, simple mixing, shaping, and baking.
SUMMARIZE & SAVE THIS CONTENT ON
Jump to:

Why You'll Love This Recipe
- Perfect side dish - these rolls are perfect to serve with soup or salad instead of garlic bread.
- Easy - because these rolls are made with sourdough, they're gonna need extra time to rise which allows me to mix them up a few hours before dinner, and then they're ready to put right into the oven.
- Easy snack or appetizer - these garlic cheese rolls make the perfect snack for game day or a birthday party.
Ingredients
This post contains affiliate links, which means I make a small commission at no extra cost to you. See my full disclosure here
How to Make Sourdough Garlic Cheese Rolls
In a large bowl or the bowl of a stand mixer fitted with the dough hook attachment, combine the first six ingredients.
If using a mixer, start mixing on low and slowly add the flour until the dough pulls away from the sides of the bowl.
If you’re not using a mixer, add the flour to the other ingredients in the bowl and knead until the dough comes together into a nice ball. Stretch and fold or knead the dough every 15-30 minutes for a couple hours. This will develop the gluten similar to how the mixer develops it by mixing.
Shape The Rolls
On a lightly floured surface, roll out the dough using a rolling pin to ¼” thick in the shape of a rectangle.
Spread the filling ingredients on the dough (see video).


Roll the dough up, beginning with the long side of the rectangle.

Using a sharp serrated knife, cut rolls into approximately 1 ½ inch pieces.

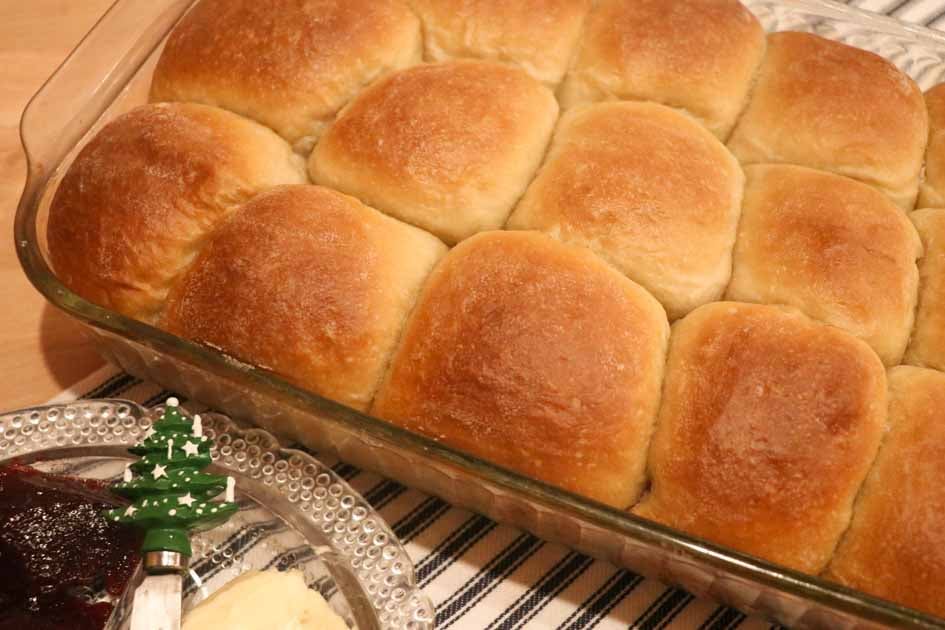
Place in a greased cast-iron skillet or baking dish.
Cover with plastic wrap or beeswax wrap, and let the dough rise on the counter overnight. If you need to wait longer than overnight to bake them, place them in the refrigerator and pull them out to finish rising a couple of hours before baking.
You can also freeze the garlic cheese rolls at this point, and take them out of the freezer to raise and bake later on.
Bake The Rolls
When ready to bake, preheat your oven to 375 degrees.
Bake for 25-30 minutes or until golden brown.

Remove from the oven and drizzle melted butter over the top of the rolls.
Serve these with a delicious soup, or dip them in marinara sauce and enjoy!
Savor every bite! Store any leftovers in an airtight container in your refrigerator for up to one week, although I know they'll never last that long.
If you try this recipe and love it, please come back and give it 5 stars! Tag me on Instagram @wagonwheelhomestead21
Tips
- To gain all of the health benefits from making these with long-fermented sourdough, be sure to allow them to bulk ferment at room temperature overnight. This will ensure that most of the phytic acid and gluten in the flour are consumed by the sourdough starter, making these much easier to digest, especially if you are gluten intolerant.
- If your sourdough starter is really thin, you may need to add a little more flour to this recipe. I always mix them until the dough pulls away from the sides of my mixer bowl, or until it’s not super sticky if mixing up by hand.
- You can mix these in a mixer (my favorite is a Bosch), or just mix up the dough and do a series of kneading or stretch and folds every few minutes for about an hour to develop the gluten in these rolls. Then just roll them out, shape and allow to rise until doubled, and then bake.
- You can use string to cut the garlic cheese rolls if you’d like, but I find that cutting them with a knife works just fine for my family.
- It is perfectly safe to add the eggs to this dough and still allow the dough to bulk ferment at room temperature overnight because the good active bacteria in the sourdough starter will prevent any bad bacteria from forming on the eggs.
- Use your favorite combination of cheeses on these rolls. I like to add Parmesan cheese and homemade mozzarella cheese.
Sourdough Garlic Cheese Rolls FAQ
If you add too much flour to your dough, they won’t be as fluffy. You don’t want a sticky dough, but not a super dry dough either. Make sure you give them enough time to rise, I prefer to raise them overnight.
Allow them to rise until they are fluffy. Make them with active sourdough starter.
Bread flour will give you the fluffiest and softest garlic cheese rolls, but you can make garlic cheese rolls with a variety of flours including whole grain or all purpose.
More Recipes Like This


Sourdough Garlic Cheese Rolls
Equipment
- 1 Stand mixer You can mix these rolls up by hand, but I usually use my Bosch mixer and just mix up the dough while I’m cleaning up supper dishes in the evening. This makes the rolls fast and easy to make.
- 1 measuring cups and spoons
- 1 Rolling Pin
- 1 sharp knife
- 1 Cast iron skillet or 9" x 13" pan
- 1 parchment paper optional
Ingredients
Dough Ingredients
- 1 cup active sourdough starter
- 1 cup water milk or buttermilk
- 2 tablespoon fat butter, oil, melted coconut oil or beef tallow (warm is best if your house is cool), or 1 egg
- 2 tablespoon sweetener honey or sugar
- 2 teaspoon salt
- 2 cups milk or buttermilk any kind of milk is good– warm is best if your house is cool
- 6-7 cups all-purpose or bread flour
Filling Ingredients
- 2 tablespoon Garlic salt
- ½ cup Butter
- 1 cup Cheese
- 8 oz Cream cheese
Instructions
- In a large bowl or the bowl of a stand mixer fitted with the dough hook attachment, combine the first six ingredients.
- If using a mixer, start mixing on low and slowly add the flour until the dough pulls away from the sides of the bowl.
- If you’re not using a mixer, add the flour to the other ingredients in the bowl and knead until the dough comes together into a nice ball. Stretch and fold or knead the dough every 15-30 minutes for a couple hours. This will develop the gluten similar to how the mixer develops it by mixing.
- On a lightly floured surface, roll out the dough using a rolling pin to ¼” thick in the shape of a rectangle.
- Spread the filling ingredients on the dough (see video).
- Roll the dough up, beginning with the long side of the rectangle.
- Using a sharp serrated knife, cut rolls into approximately 1 ½ inch pieces.
- Place in a greased cast-iron skillet or baking dish.
- Cover with plastic wrap or beeswax wrap, and let the dough rise on the counter overnight. If you need to wait longer than overnight to bake them, place them in the refrigerator and pull them out to finish rising a couple of hours before baking.
- You can also freeze the garlic cheese rolls at this point, and take them out of the freezer to raise and bake later on.
- When ready to bake, preheat your oven to 375 degrees.
- Bake for 25-30 minutes or until golden brown.
- Remove from the oven and drizzle melted butter over the top of the rolls.
- Serve these with a delicious soup, or dip them in marinara sauce and enjoy!
- Savor every bite! Store any leftovers in an airtight container in your refrigerator for up to one week, although I know they'll never last that long.
- If you try this recipe and love it, please come back and give it 5 stars! Tag me on Instagram @wagonwheelhomestead21

turned out perfect. thanks!
Great with Spaghetti