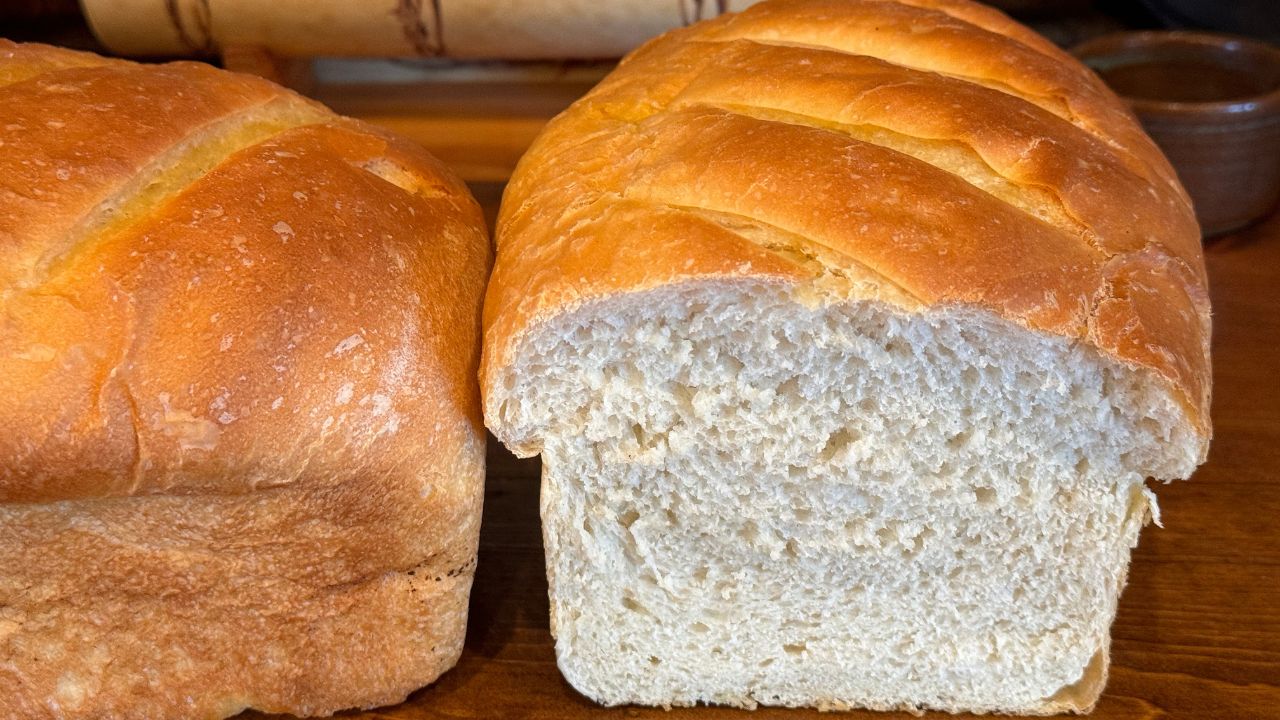
Soft Sourdough Sandwich Bread
If you’ve been searching for a soft, reliable sourdough sandwich bread that’s easy enough for everyday baking, you’re in the right place. This recipe creates a fluffy, tender loaf that’s perfect for everything from a simple breakfast toast to a hearty cold beef sandwich recipe piled high with your favorite fixings.
One of the best things about this soft sourdough sandwich bread is its versatility. It slices beautifully, holds up well to spreads and fillings, and makes an incredible base for both classic and creative meals—whether you’re making a comforting chicken patty melt, a melty caprese grilled cheese with fresh tomatoes and basil, or even learning how to make sourdough French toast for a cozy weekend breakfast.
Whether you’re new to sourdough or just want a no-fuss sandwich loaf your whole family will love, this recipe delivers consistent, delicious results every time.
Quick Look: Soft Sourdough Sandwich Bread
- ⏱️ Prep Time: 15 hours
- 🍳 Cook Time: 30 minutes (plus 15 minutes to rest)
- 🕒 Total Time: 15 hrs, 45 minutes
- 👥 Servings: 24
- 📊 Calories: ~38 kcal per serving (based on nutrition panel)
- 🔥 Cook Method: Oven-baked in bread pans.
- 👩🍳 Flavor Profile: Slightly tangy, not super-sweet, not sour.
- ⭐ Difficulty: Easy, making it great for making weekly.
SUMMARIZE & SAVE THIS CONTENT ON
This bread is made without commercial yeast, and depends on the wild yeast from an active bubbly sourdough starter to raise the bread. The recipe is very flexible, and you can adjust the amount of sweetener in it, and substitute eggs, melted beef tallow, or oil for the butter, depending on what you have readily available. You can also freeze it the same day you bake it, and it will taste nice and fresh. Once you try this sandwich recipe, it will be your go-to sourdough sandwich bread.
Jump to:
- Quick Look: Soft Sourdough Sandwich Bread
- Why You'll Love This Recipe
- Why Make Sourdough Sandwich Bread
- Key Ingredients
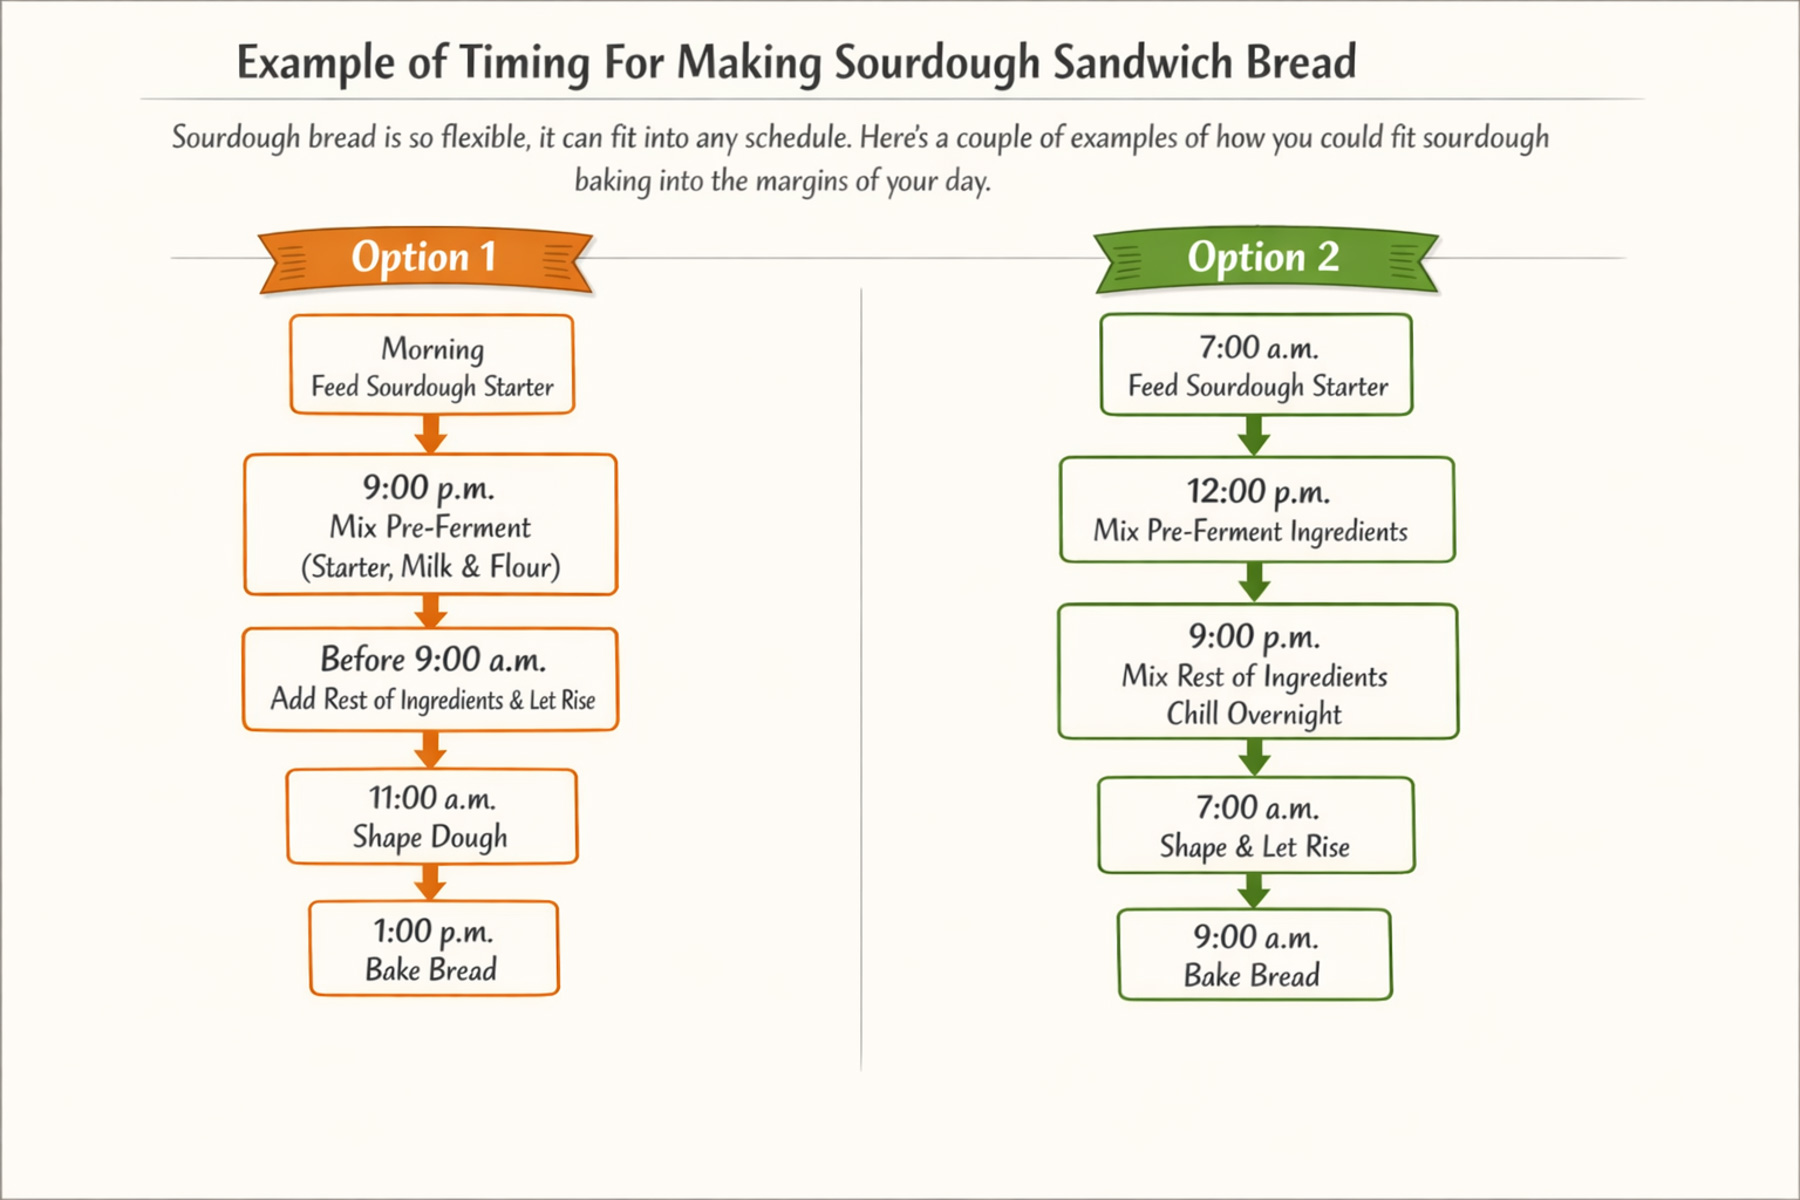
- Example of Timing For Making Sourdough Sandwich Bread
- How To Make Soft Sourdough Sandwich Bread (Step by Step)
- Helpul Tips
- Soft Sourdough Sandwich Bread FAQ
- Other Recommended Sourdough Bakes
- Soft Sourdough Sandwich Bread - Easy Recipe
Why You'll Love This Recipe
Simple and Easy - this entire process takes about 24 hours from start to finish, but it takes less than 10 minutes of active time, as most of the time it is just fermenting or raising. The timing of this is also flexible and can be adjusted to almost any schedule.
No Scale Needed - this recipe can easily be made without a scale as everything is measured in cups. You can switch the recipe card to grams if you prefer to measure that way.
Why Make Sourdough Sandwich Bread
- It’s wise to know how to make bread without having to purchase yeast at the grocery store in case it is ever not available for some reason.
- The taste and texture of this sourdough sandwich bread will be unlike any other sandwich bread you will make. It’s soft, not crumbly, and will stay soft and moist for several days.
- It will stay fresh longer on your counter without molding because it is already inoculated with the beneficial bacteria from the sourdough making it harder for mold to grow.
- The addition of fat, sweetener, and milk to this sandwich bread make it an enriched dough that makes a soft and pliable bread.
Key Ingredients
- Flour - I recommend using all or mostly white flour in this sourdough sandwich bread as it will make a softer and more beautiful dough. Bleached or unbleached all-purpose flour or bread flour works the best. Unbleached flour is obviously healthier for you and bread flour will make a more beautiful loaf than just all-purpose flour because it has a higher protein content, but any of these flours will work. If you use whole grain or whole wheat flour, I suggest using at least half all-purpose or bread flour when making your bread for best results. A loaf made with 100% whole grain flour will be more dense than you will like for sandwiches. I like to get my high-protein bread flour in bulk from Azure Standard. You can check it out here.
- Milk - You can use any kind of milk in this recipe. I like to use raw milk or buttermilk from my Jersey cows, but you can use any kind of milk that you like, including coconut or almond milk to make it dairy-free. The milk helps to give the bread a softer texture.
- Fat - Here’s where it gets fun because this recipe is so flexible. If you’re making this bread in the summer, it’s a good idea to keep the dough close to room temperature so it doesn’t ferment too quickly and possibly overferment. I like to use room temperature eggs or butter for my fat during the summer. In the winter, it’s a good idea to keep your dough a little warmer so it doesn’t take quite so long to rise. In this case, I like to use melted butter, coconut oil, or beef tallow as my fat. The warmth from melting the fat helps the bread to rise faster. Any of these fats will work at anytime, and you can adjust it based on what you have on hand and the amount of time you have to make the bread.
- Sweetener - You can use honey, sugar, or anything similar in this recipe. I like to make it with a small amount of sweetener, but you can certainly increase the amount of sweetener if you’d like the bread to be sweeter. If you add more sweetener, the bread will taste less sour, which is more appealing to some people.
- Salt - I like to use redmond real salt, but you can use whatever salt you have on hand. Salt is what gives the bread its flavor, and it’s really important not to leave it out.
Example of Timing For Making Sourdough Sandwich Bread
How To Make Soft Sourdough Sandwich Bread (Step by Step)
**PLEASE NOTE: After many requests, I updated this recipe to only make two loaves instead of four, as many people wanted to make less than four loaves. If you want to make more loaves, you can scale the recipe up in the recipe card as needed.
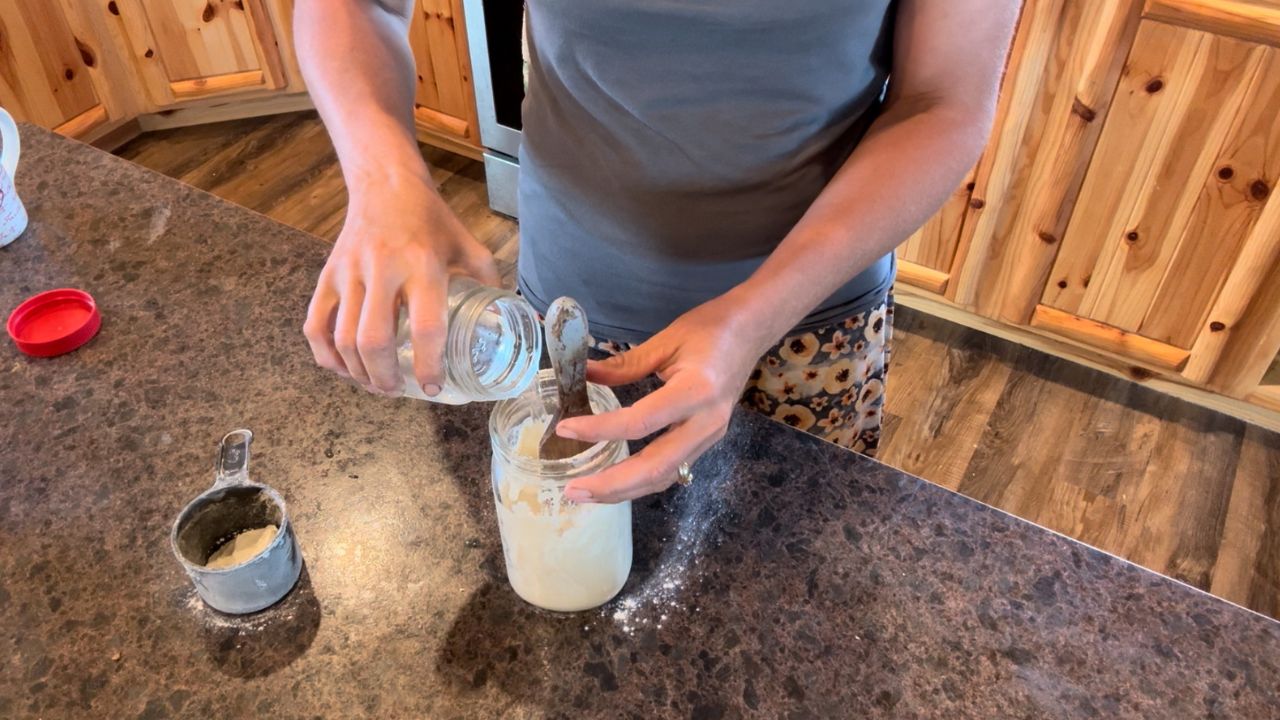
- Feed the starter: to a small amount of starter (no more than ½ cup), you’ll want to add at least 2 cups of flour, and about 1 ⅓ cups of warm water. I like to complete this step before noon so the starter has plenty of time to rise before evening.

- Happy bubbly starter: allow the fed starter to become active while sitting out at room temperature. When the starter has risen to the top of the container and is happy and active, proceed to the next step.

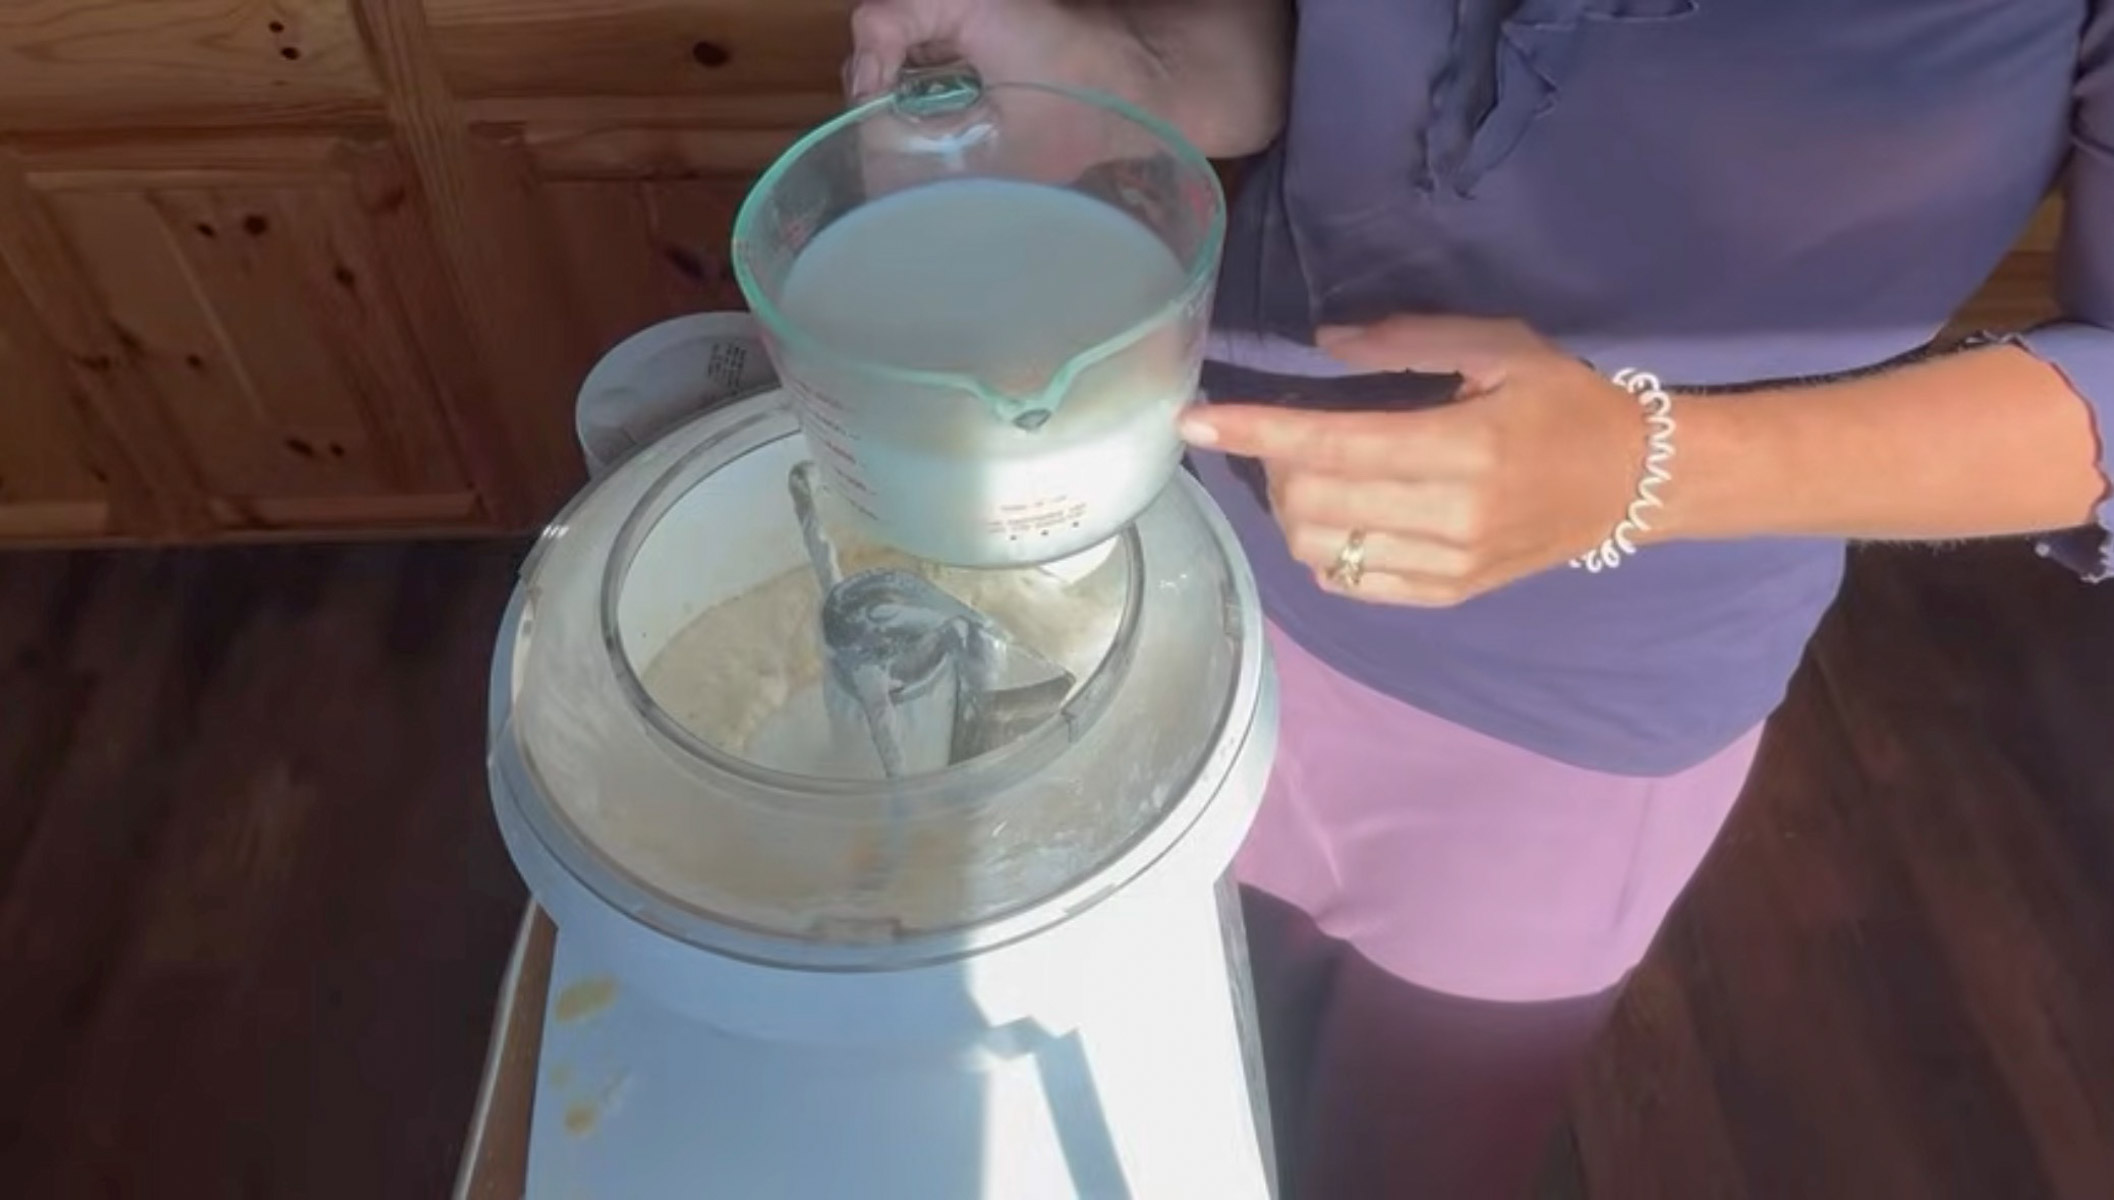
- Mix up the preferment: in the bowl of a stand mixer, combine 2 cups liquid (this can be water, milk or buttermilk - and it should be warm if it’s winter), 2 cups active sourdough starter, and 3 cups all purpose or bread flour. Mix on low speed for a minute or so using the dough hook attachment. Cover and allow to ferment in the bowl of the stand mixer overnight. I like to complete this step in the evening before going to bed.
- Add more ingredients: The next morning, add your fat of choice, sweetener, salt, and milk (warm in winter and cold in summer). Turn on the mixer and allow to partially combine.

- Mix up the bread: then add 9-11 cups of all-purpose or bread flour until the dough pulls away from the sides of the bowl. Mix on medium speed for 8 to 10 minutes to fully develop the gluten in the dough. Turn off the mixer and check to make sure the dough isn’t too sticky. You want it to be a little sticky, but not so sticky that you can’t handle it. If the dough is really sticky, add more flour ¼ cup at a time until it's less sticky. I like to stretch the dough upwards to see if I can see through it without tearing it; this is sometimes called the windowpane test.
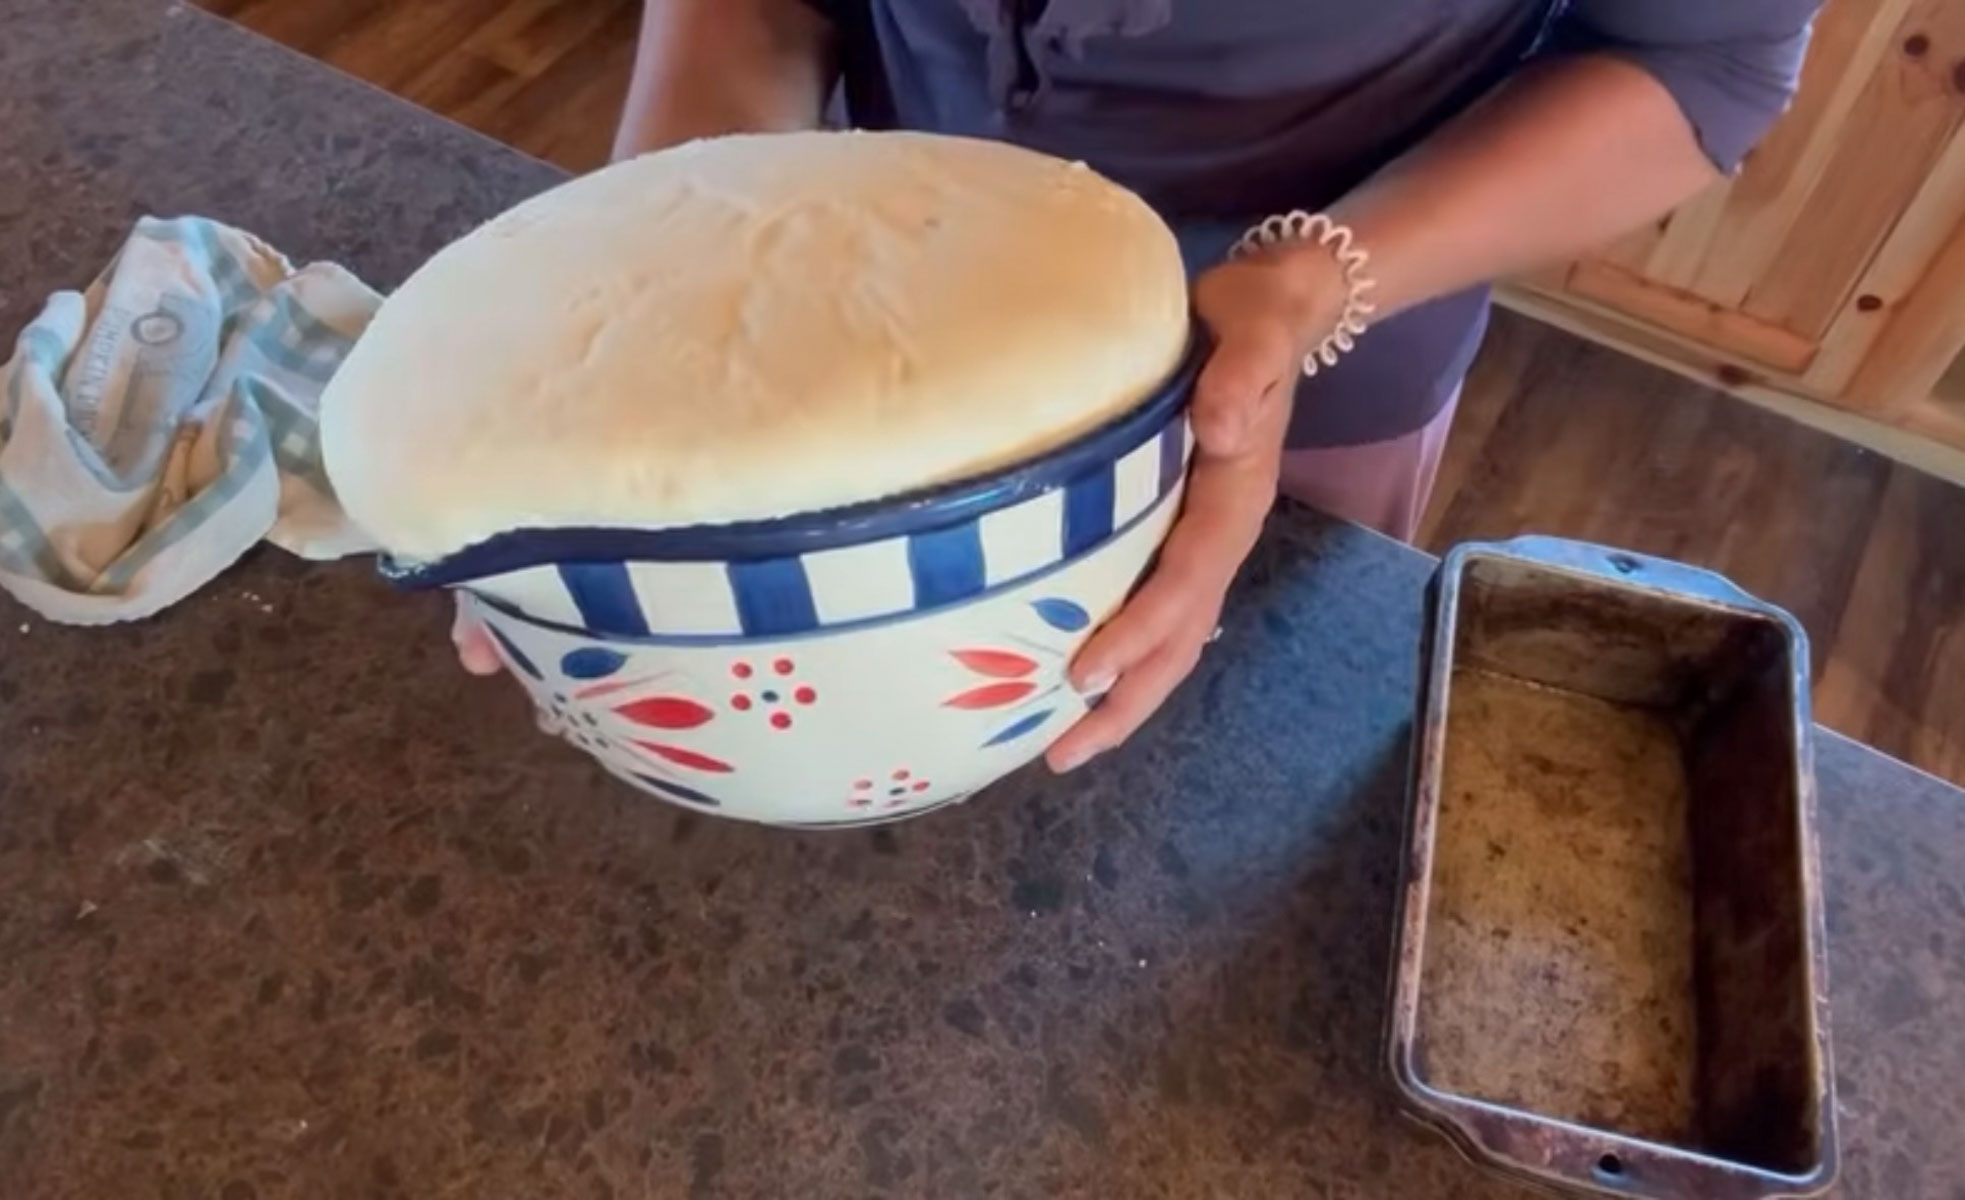
- First rise: Put dough into a large oiled mixing bowl, or leave it in the bowl of your stand mixer, cover, and let the dough rise in a warm place for 2-3 hours or until close to double in size. If it’s winter and your house is cold, it may take longer to rise. That’s okay, let it rise as long as it needs to until it gets close to doubling in size.
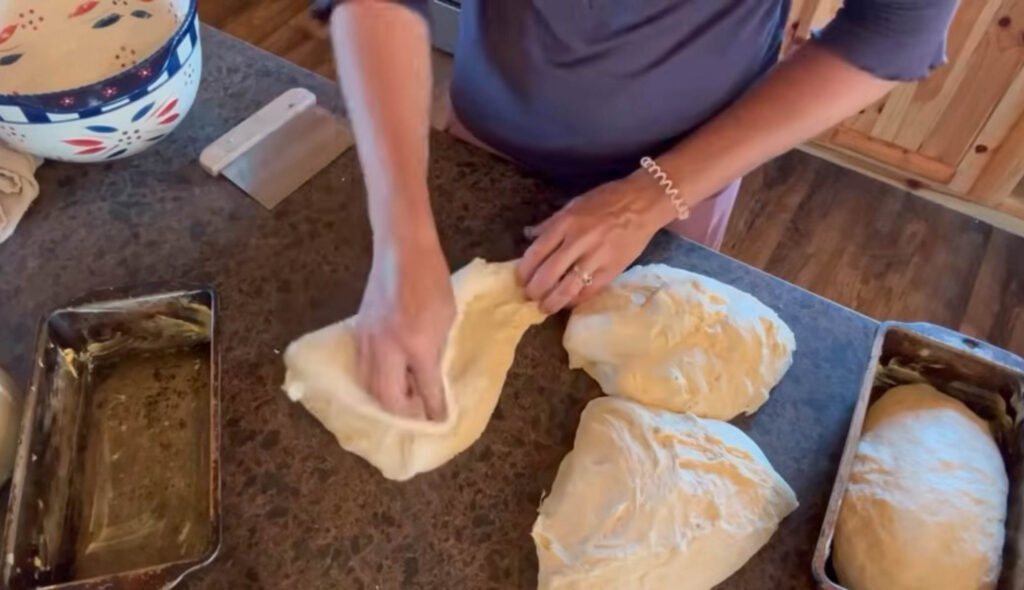
- Shape the bread: Once the dough has risen, punch it down and dump it out onto a lightly floured surface. Shape into loaves by dividing the dough using a bench scraper. Flatten each piece of dough into a rectangle. Take each corner of dough that is closest to you and place it in the middle of the rectangle forming a triangle. Take tip of the triangle that is closest to you and roll away from you until the dough has formed into a loaf. Tuck the edges under if needed and place in greased loaf pans.

- Second rise and score: Allow the dough to do its second rise until just above the edges of the loaf pans. This usually takes another 2-3 hours, but watch them closely if your house is warm, so they don’t rise too far and over-ferment. Preheat your oven to 375 degrees. Using a bread lame or razor blade, slash the tops of the loaves to allow more room for the loaf to expand while baking. Place the loaves into the preheated oven and bake for 30 minutes or until the internal temperature of the bread is 190 degrees.

- Remove from the oven and cool: Remove the bread from the oven. Immediately take it out of the bread pans, and place it on a cooling rack. Brush the golden brown crust with butter to keep it nice and soft, and allow bread to cool.

- Enjoy and store: Be sure to enjoy a couple of slices with fresh butter and strawberry jam.
Helpul Tips
- Don’t over-ferment the dough. Watch it closely in the summertime, as it will rise a lot faster than in the winter.
- Be sure to use an active sourdough starter to ensure that your bread will rise properly.
- Use a stand mixer if possible, as it will make this bread fast and easy to make. The Bosch stand mixer is my favorite heavy-duty mixer
- This bread can be frozen for up to 3 months. It can be sliced and frozen in smaller portions if necessary.
Soft Sourdough Sandwich Bread FAQ
Soft sourdough sandwich bread is perfect for everyday meals. You can use it for toast, sandwiches, grilled cheese, or even breakfast recipes. It works especially well for a cold beef sandwich recipe, chicken patty melt, or a caprese grilled cheese, thanks to its soft texture and sturdy crumb.
To make sourdough French toast, whisk together eggs, milk, vanilla, and a pinch of cinnamon. Dip slices of sourdough sandwich bread into the mixture, then cook on a buttered skillet over medium heat until golden brown on both sides. The slight tang of sourdough adds incredible flavor.
Yes! Sourdough sandwich bread is excellent for grilled cheese because it crisps up beautifully while staying soft inside. It’s especially delicious in recipes like a caprese grilled cheese or even a savory chicken patty melt.
You can make a wide variety of sandwiches, from a simple turkey sandwich to a loaded cold beef sandwich recipe. This bread is sturdy enough for layered deli sandwiches and soft enough for warm melts.
Store your bread in an airtight container or bag at room temperature for up to 3 days. You can also freeze slices and thaw as needed to maintain freshness and softness. Whole loaves of sourdough sandwich bread can be frozen for up to 3 months.
Yes, leftover sourdough bread makes great croutons because it has a tangy flavor and can easily be tossed with some beef tallow and seasonings and toasted in the oven for deliciously crunchy homemade sourdough croutons.

Other Recommended Sourdough Bakes


If you try this recipe and love it, please come back and give it 5 stars! Tag me on Instagram @wagonwheelhomestead21. I can’t wait to see what all you make!

Soft Sourdough Sandwich Bread - Easy Recipe
Ingredients
Preferment Ingredients
- 1 cup active sourdough starter
- 1 cup water milk or buttermilk
- 1 ½ cup flour
Dough Ingredients
- 2 tablespoon fat butter, oil, melted coconut oil or beef tallow (warm is best if your house is cool), or 1 egg
- 2 tablespoon sweetener honey or sugar
- 2 teaspoon salt
- 1 ½ cups milk or buttermilk any kind of milk - warm is best if your house is cool
- 4 ½ - 5 ½ cups all purpose or bread flour
Instructions
- **PLEASE NOTE: After many requests, I updated this recipe to only make two loaves instead of four, as many people wanted to make less than four loaves. If you want to make more loaves, you can scale the recipe up in the recipe card as needed.
Feed Sourdough Starter
- To a small amount of starter (about ¼ cup), you’ll want to add about 1 cup of flour, and about ⅔ cups warm water. I like to feed my starter lots of flour and water when I prepare to make bread, and then I save the extra starter in my refrigerator to use in all my favorite sourdough discard recipes. Feel free to add more flour and water to your starter if desired, but you’ll want to feed it at least 1 cup of flour, as you’ll need 1 cup of starter for the bread recipe. I like to complete this step in the morning.
- Allow fed starter to become active while sitting out at room temperature. When starter has risen all the way to the top and is happy and active, proceed to the next step.
Combine Pre-ferment Ingredients
- In the bowl of a stand mixer, combine the pre-ferment ingredients. Mix on low speed for a minute or so using the dough hook attachment. Cover and allow to ferment in the bowl of the stand mixer overnight. I like the Bosch mixer because it is so heavy duty, and also because it has a lid that can easily be put on while the bowl is on the stand mixer. I like to complete this step in the evening before going to bed.
Mix Up The Bread
- The next morning, add your fat of choice (I prefer butter or an egg), sweetener, salt, milk (warm in winter and cold in summer). Turn on the mixer and allow to partially combine.
- Then add the flour until the dough pulls away from the bowl and mix on medium speed for about 5-10 minutes. This will help to develop the gluten and make the bread soft and pliable. Turn off mixer and check to make sure dough isn’t really sticky. You want it to be a little sticky, but not so sticky that you can’t handle it. (See video below).
First Rise
- Let the dough rise in a warm place for 2-3 hours or until close to double. If it’s winter and your house is cold, it may take longer to raise. That’s okay, let it raise as long as it needs to until it gets close to doubling in size. If you're making several loaves, it's best to take it out of the bowl of the stand mixer, and put it into a bigger bowl to raise.
- Once dough has risen, punch it down and dump it out onto a lightly floured surface. Shape into loaves by dividing dough into two pieces using a bench scraper. Flatten each piece of dough into a rectangle. Take each corner of dough that is closest to you and place in the middle of the rectangle forming a triangle. Take tip of triangle that is closest to you and roll away from you until the dough has formed into a loaf. Tuck the edges under if needed and place in greased loaf pans. (See video below).
Second Rise
- Allow dough to do it's second rise until its just above the edges of the loaf pans. This usually takes another 2-3 hours, but watch them closely if your house is warm so they don’t raise too far and over ferment.
Bake
- Preheat the oven to 375 degrees. Using a bread lame or razor blade, slash the tops of the loaves to allow more room for the loaf to expand.
- Place loaves into oven and bake for 30 minutes or until the internal temperature of the bread is 190 degrees.
- Remove from the oven and bread pans, and place on cooling rack. Brush the golden brown crust with butter to keep it nice and soft, and allow bread to cool.
Enjoy
- Slice and enjoy a couple of slices with fresh butter and strawberry jam. There's nothing better!
- Can be stored in a beeswax wrap on counter or in refrigerator for up to a week, or frozen for up to three months. You can even slice and freeze a few slices in separate bags so you only have to take out a little bit of bread at a time. It’s best to freeze bread the same day that it is baked for the freshest taste.
Video
Notes
- Be sure to use an active sourdough starter to ensure that your bread will rise properly.
- Don’t over-ferment the dough. Watch it closely in the summertime, as it will rise a lot faster than in the winter.
- Use a stand mixer if possible, as it will make this bread so fast and easy to make. The Bosch stand mixer is my favorite heavy-duty mixer
- This bread can be frozen for up to 3 months. It can be sliced and frozen in smaller portions if necessary.
- Make a DIY beeswax wrap for storing your bread in on the counter. This will help to inhibit any mold growth on the bread.


You have the best recipes and especially your sourdough recipes. Every one of your SD recipes has been spot on and truly a success. We all know that SD can sometimes be disappointing but you have such a laid back approach and uplifting attitude that the stress of disaster has been banished from my kitchen. Thank you! I have been baking yeast breads and SD breads and treats for about 50 years and just since I’ve been using your recipes and methods have I truly had repeated success. Thank you again
Awe thank you for your sweet comment! I'm so happy to hear of your success, that makes me very happy! If you ever have any questions, please reach out and I'll do my best to help 🙂
So I decided to try this out, but after leaving it out for 3-4 hrs, it still hasn't doubled yet. can I leave it out again overnight since my house is cool? I don't want to ovenproof it though either.
If your house is cool, I would go ahead and leave it out overnight, I don't think it'll overproof it. It doesn't really have to double in size, but it should be at least 50% bigger than when you shaped it, if that makes sense. It should rise to the top of the bread pan. How strong is your starter? I would tend to think that your starter might be a little weak if it still hasn't risen to the top of the pan. Let me know 🙂
Love watching you cook and live life
Awe thank you!
Hello! My family is enjoying this recipe! Thank you! I'm new to the sourdough scene and am grateful for a simple sandwich loaf recipe instead of the traditional rounds. I am noticing that the crust is coming out a little tough, though. Suggestions?
I'm glad you're enjoying it! Is it the top or the bottom crust that seems a little tough? I always brush mine with butter after it comes out of the oven. You can also try putting a cookie sheet on the rack below where these bake in the oven if the bottom crust is tough. I've never experienced a tough crust at all with this, but hopefully this will help. Let me know.
Thank you for the tip! I placed a baking sheet below, plus, I actually only baked the loaves for about 21 minutes. They are perfectly done, super soft, and the crust isn't tough.
Oh good! You're welcome!
After great results using an egg instead of butter and a little extra starter (2 2/4c), I can’t even get my starter started! Hope it’s the cold weather but I did use my warming pad. Big question is if I double or triple the recipe, should I also be 2x or 3x the starter ingredients. Biggest recipe calls for 3 c starter but nowhere does it say alter the ingredient amts past 1/4 c starter.
I'm sorry you're having trouble with your starter, I would make sure to feed it with warm water and make sure that it is getting fed more flour and water, than you have starter, so that it's not hungry if that makes sense. And yes, you will want to double or triple the amounts of starter if you double or triple this recipe
This recipe is so good, definitely will be making it again!