Sourdough Discard Sandwich Bread - Easy Recipe
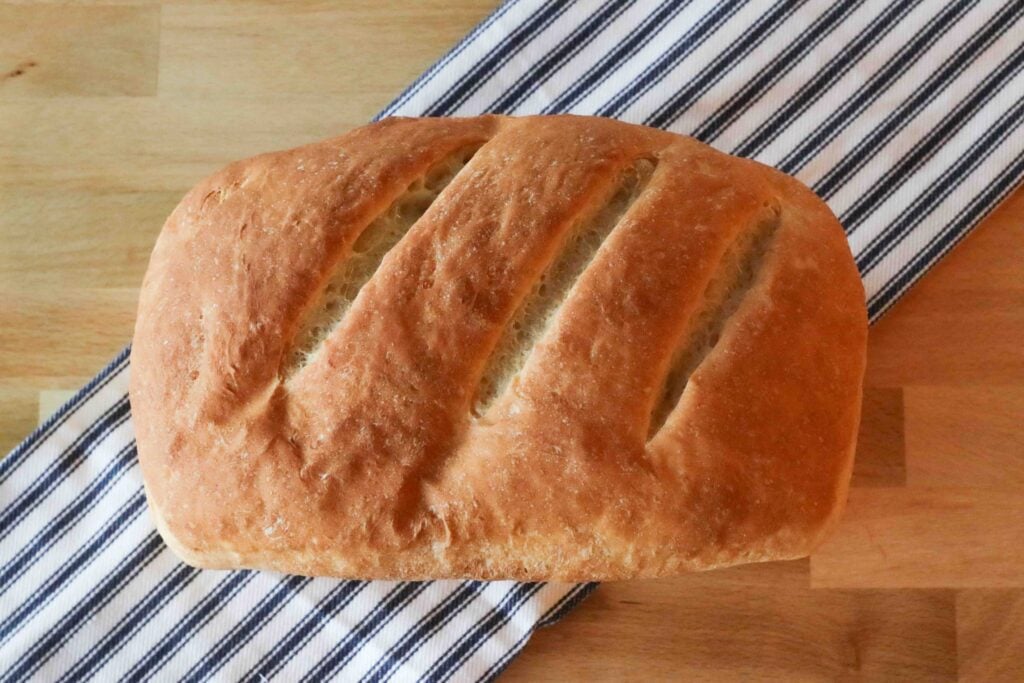
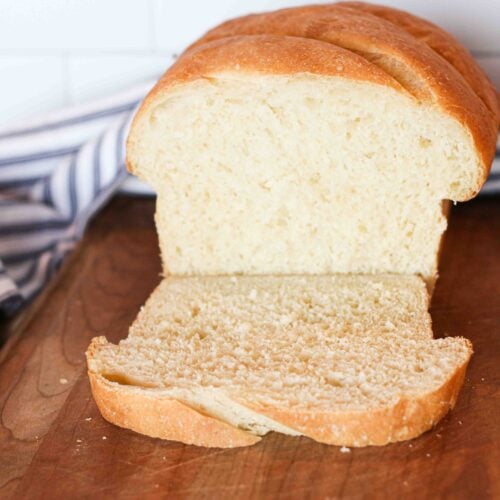
This sourdough discard sandwich bread has a fluffy texture, a soft crust and makes the perfect sandwiches! Whenever possible, I try to make long fermented sourdough sandwich bread because of the health benefits. But when I’m in a hurry, and just need some sandwich loaves made really quickly, I make this sourdough discard version of my favorite sandwich bread recipe.
Because this recipe is made with sourdough discard, you have to add some conventional yeast to the dough in order to get the bread to raise. Quick sourdough bread made with yeast isn’t as healthy as long fermented sourdough bread, but it’s still better for you than regular bread from the store because at least some of the flour in the recipe is fermented in the sourdough starter. I think you’ll love this quick sourdough sandwich bread recipe especially in the summertime when it’s sandwich season.

Quick Look: Sourdough Discard Sandwich Bread
- ⏱️ Prep Time: 4 hours
- 🍳 Cook Time: 30 minutes
- 🕒 Total Time: 4 hrs, 30 minutes
- 👥 Servings: 24
- 📊 Calories: ~11 kcal per serving (based on nutrition panel)
- 🔥 Cook Method: Oven-baked in bread pans.
- 👩🍳 Flavor Profile: Mildly tangy with a soft, tender crumb and slightly chewy crust; classic, versatile sandwich bread taste.
- ⭐ Difficulty: Easy – beginner-friendly, simple mixing, shaping, and baking.
SUMMARIZE & SAVE THIS CONTENT ON
Jump to:
Why You'll Love This Recipe
- Simple and Easy – I like to make this recipe because it is so simple. There is no stretching and folding or difficult steps to follow. I just put it into my Bosch mixer, mix it up, and then let it rise a couple times and bake. The entire process takes about half a day from start to finish, but it takes less than 10 minutes of active time, as most of the time it is just raising or baking. The timing of this is also flexible and can be adjusted to almost any schedule.
- Quick - when I need sandwich bread quickly, this sourdough discard sandwich loaf is my go-to recipe. Although it’s not as healthy as my long-fermented sandwich loaf, it works great when we need sandwich bread right away because it takes less time to make.
- No Scale Needed – this recipe can easily be made without a scale as everything is measured in cups, although I have added in the option for you to convert this to grams in the recipe card below.
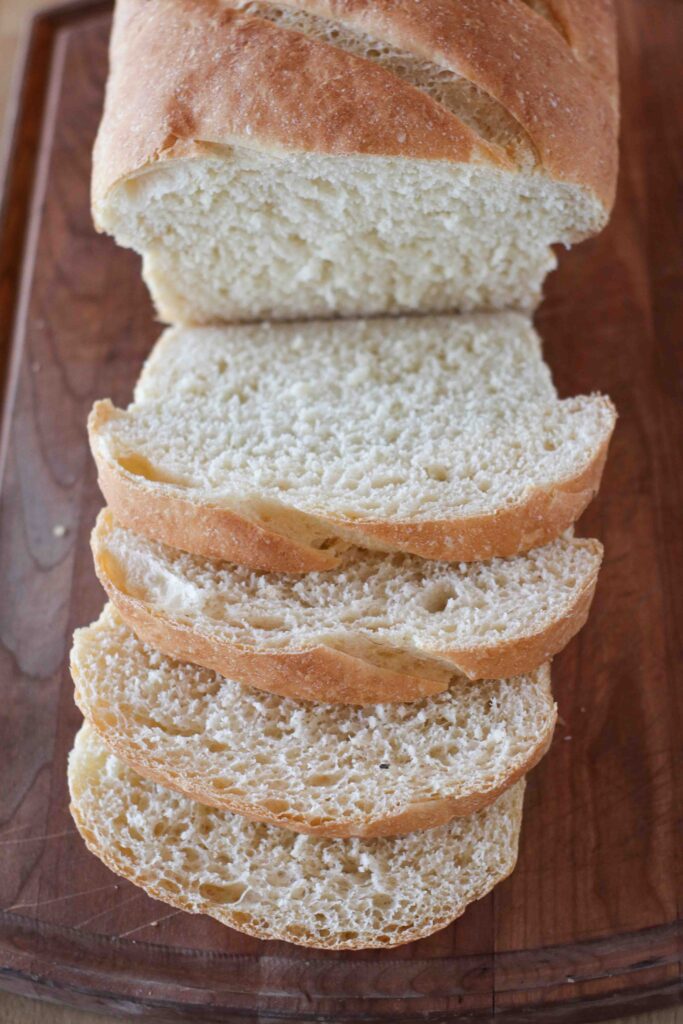
- Taste and Texture - The taste and texture of this sourdough sandwich bread will be unlike any other sandwich bread you will make. It has a super soft crumb, and will stay soft and moist for several days.
Ingredients
This post contains affiliate links, which means I make a small commission at no extra cost to you. See my full disclosure here
How To Make Sourdough Discard Sandwich Bread
In the bowl of a stand mixer fitted with the dough hook attachment, add all the ingredients except for the flour and mix on low speed just until combined. Then while the mixer is on low speed, add the flour until the dough pulls away from the sides of the bowl.

Turn the mixer on medium speed and allow the dough to mix for 8-10 minutes to allow the gluten to fully develop.
Turn off the mixer and check the dough to make sure it’s soft and fluffy but not too sticky. If it feels super sticky, you can add a little more flour until it’s not so sticky.
Cover the mixer bowl and let the dough rise until double.
Once the dough has risen, punch it down and dump it out onto a lightly floured surface. Shape into loaves by first dividing the dough using a bench scraper. Flatten each piece of dough into a rectangle. Take each corner of dough that is closest to you and place in the middle of the rectangle forming a triangle. Take tip of triangle that is closest to you and roll away from you until the dough has formed into a loaf. Tuck the edges under if needed and place in greased loaf pans. (See video below).

Second Rise
Allow dough to do it’s second rise until its just above the edges of the loaf pans.
Bake
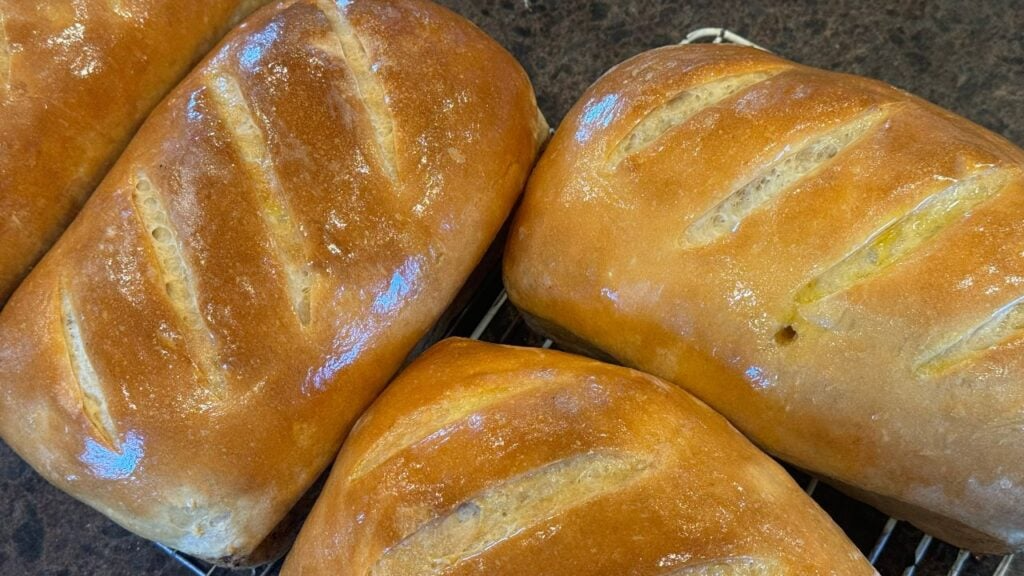
Preheat the oven to 375 degrees. Using a bread lame or razor blade, slash the tops of the loaves to allow more room for the loaf to expand.
Place loaves into oven and bake for 30 minutes or until the internal temperature of the bread is 190 degrees.
Remove from the oven and bread pans, and place on cooling rack. Brush the top of the loaf with butter to keep it nice and soft, and allow the bread to cool.
Enjoy
Slice and enjoy a couple of slices with fresh butter and strawberry jam. There’s nothing better than homemade bread!
Can be stored in a plastic bag on counter or refrigerator for up to a week, or frozen for up to three months. You can even slice and freeze a few slices in separate bags so you only have to take out a little bit of bread at a time. It’s best to freeze bread the same day that it is baked for the freshest taste.
If you try this recipe and love it, please come back and give it 5 stars! Tag me on Instagram @wagonwheelhomestead21. I can’t wait to see what all you make!
Tips
- Use a stand mixer if possible, as it will make this bread so fast and easy to make. You can also make this without a mixer, and just use your hands, but it will be more work of course.
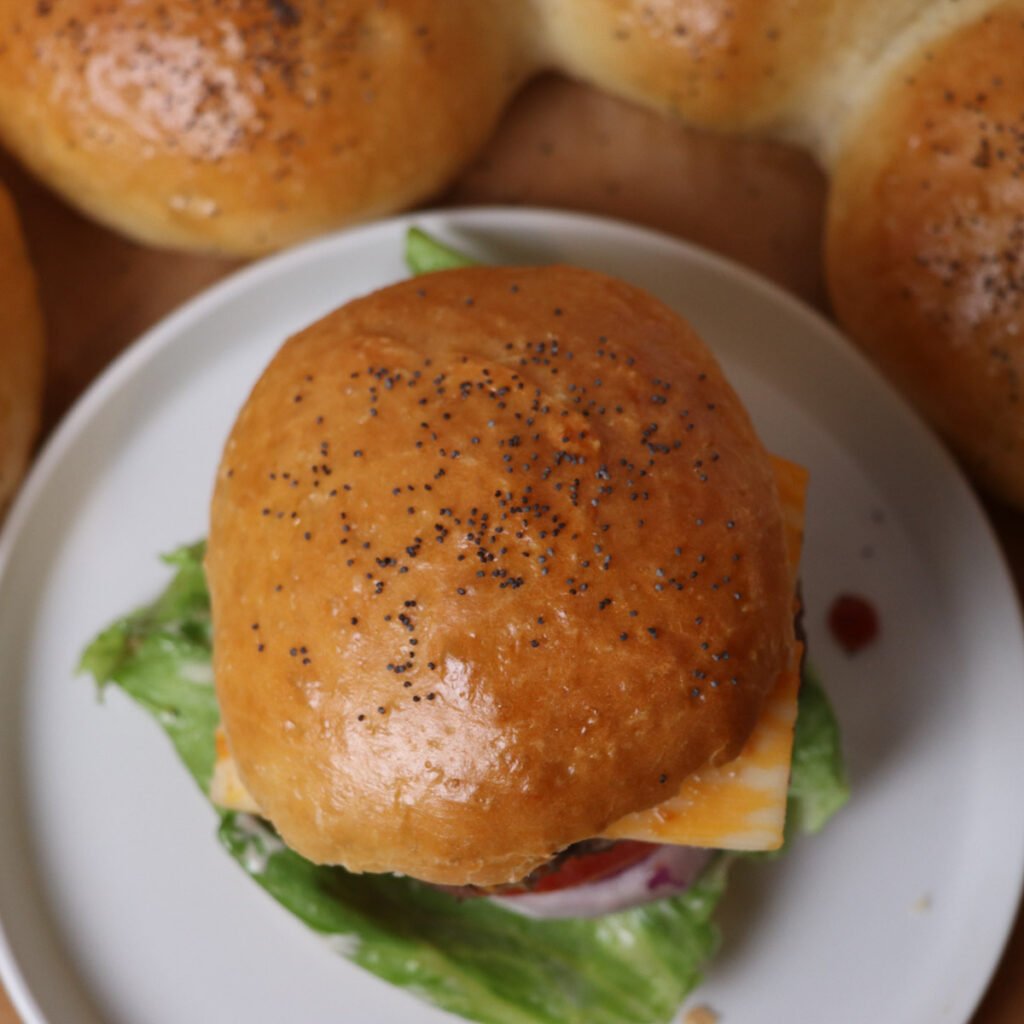
- This bread freezes well, so if you won’t be able to eat all the loaves right away, you can just put some in the freezer, or shape some of the dough into cinnamon rolls or hamburger buns and bake it up that way.
This post contains affiliate links, which means I make a small commission at no extra cost to you. See my full disclosure here
Pin For Later

More Recipes Like This


Sourdough Discard Sandwich Bread - Easy Recipe
Equipment
- 1 Stand mixer my favorite mixer is a Bosch. They are very heavy-duty and a good investment if you plan to cook from scratch. They pay themselves off in no time, especially with the high cost of groceries.
- 1 measuring cups and spoons
- 1 Large bowl
- 1 Bench scraper
- 1 Loaf pans I like to use these large bread pans.
- 1 bread bags
Ingredients
- 1 cup sourdough discard
- 2 ½ cups milk or buttermilk any kind of milk - warm is best if your house is cool
- 2 tablespoon fat butter, oil, melted coconut oil or beef tallow (warm is best if your house is cool), or 1 egg
- 2 tablespoon sweetener honey or sugar
- 2 tablespoon yeast active or instant
- 2 teaspoon salt
- 6-7 cups all purpose or bread flour
Instructions
- In the bowl of a stand mixer fitted with the dough hook attachment, add all the ingredients except for the flour and mix on low speed just until combined. Then while the mixer is on low speed, add the flour until the dough pulls away from the sides of the bowl.
- Turn the mixer on medium speed and allow the dough to mix for 8-10 minutes to allow the gluten to fully develop.
- Turn off the mixer and check the dough to make sure it’s soft and fluffy but not too sticky. If it feels super sticky, you can add a little more flour until it’s not so sticky.
- Cover the mixer bowl and let the dough rise until double.
- Once the dough has risen, punch it down and dump it out onto a lightly floured surface. Shape into loaves by first dividing the dough using a bench scraper. Flatten each piece of dough into a rectangle. Take each corner of dough that is closest to you and place in the middle of the rectangle forming a triangle. Take tip of triangle that is closest to you and roll away from you until the dough has formed into a loaf. Tuck the edges under if needed and place in greased loaf pans. (See video below).
Second Rise
- Allow dough to do it’s second rise until its just above the edges of the loaf pans.
Bake
- Preheat the oven to 375 degrees. Using a bread lame or razor blade, slash the tops of the loaves to allow more room for the loaf to expand.
- Place loaves into oven and bake for 30 minutes or until the internal temperature of the bread is 190 degrees.
- Remove from the oven and bread pans, and place on cooling rack. Brush the top of the loaf with butter to keep it nice and soft, and allow the bread to cool.
Enjoy
- Slice and enjoy a couple of slices with fresh butter and strawberry jam. There’s nothing better than homemade bread!
- Can be stored in a plastic bag on counter or refrigerator for up to a week, or frozen for up to three months. You can even slice and freeze a few slices in separate bags so you only have to take out a little bit of bread at a time. It’s best to freeze bread the same day that it is baked for the freshest taste.
Notes
- Use a stand mixer if possible, as it will make this bread so fast and easy to make. You can also make this without a mixer, and just use your hands, but it will be more work of course.
- This bread freezes well, so if you won’t be able to eat all the loaves right away, you can just put some in the freezer, or shape some of the dough into cinnamon rolls or hamburger buns and bake it up that way.


This was the easiest bread I have ever made and delicious!
Awe I'm so glad!
Just curious, why so much yeast, 2 tbs, is that correct?
Yes!
This bread turned out so good, love it and will make more. Just curious, why so much yeast, 2 tbs, is that correct?
Yes that is correct! It's about 1 Tbl. per loaf and these are large loaves. I like that much yeast because it allows it to rise fairly quickly so making bread doesn't take all day :-).
This is the best bread!
Can I halve this recipe
You sure can!