How To Make Nourishing Beef Bone Broth
Learning how to make nourishing beef bone broth is simple and easy. Homemade bone broth has a depth of flavor that you won’t find in broth from the grocery store, and it will take your recipes that call for broth up a notch for sure.

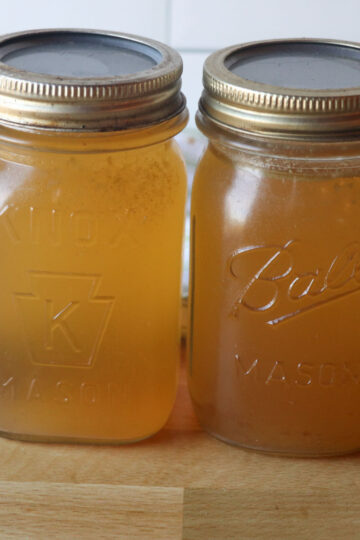
You can keep broth in the refrigerator for about a week, or it can be frozen or canned. I prefer to can my broth so it doesn’t take up freezer space and I have it available all year long. Canned bone broth is a pantry staple for me and I like to make about 100 pints of bone broth at a time. That way I only have to make one batch of bone broth a year.
You can make small batches of broth in a pot on the stove or in a slower cooker or crockpot. I like to make large batches of broth in my roasters, or if you’re in a hurry you can speed up the process of making broth by using your instant pot.
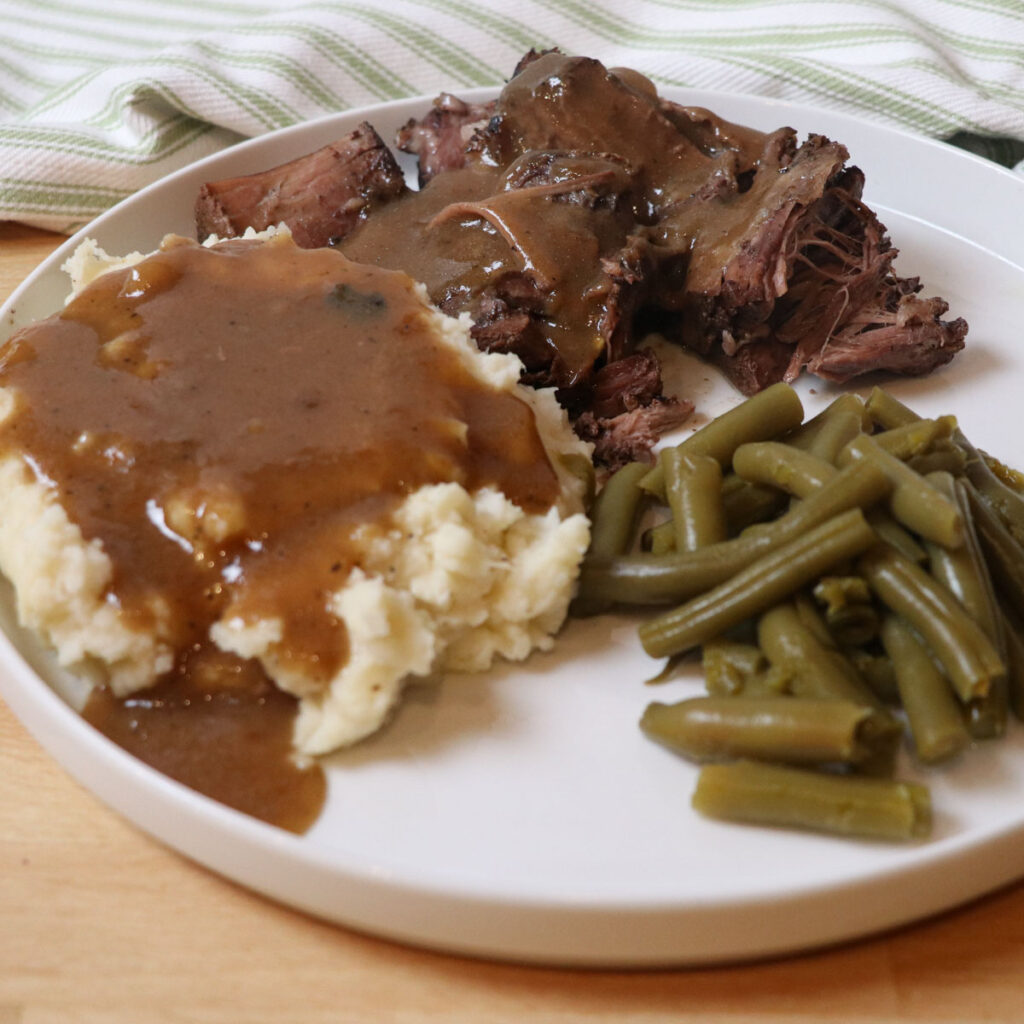
Anytime I can add broth to a recipe I do it. Not only because of the rich flavor it adds but also because it is rich in vitamins, minerals and collagen. I love being able to grab a jar off the pantry shelf and quickly add it to a meal. Some of our favorite ways to use canned broth are in
- soups
- stews
- beef and noodles
- cream sauce for pasta
- homemade mushroom soup
- beef pot pie
- sourdough stuffing

Why You’ll Love Making Your Own Beef Bone Broth
- I already mentioned that the flavor will be superior to any broth you can purchase from the grocery store.
- It will be rich in vitamins, minerals and collagen.
- You can make it in large batches and freeze it or can it.
- It can also be made in small batches if you only have a few bones at at time.
- It’s a great way to utilize all the nutrition from the animal, whether it’s one you raised or purchased. We also like to render our own beef tallow, and utilize that healthy fat in our diet.
- Making bone broth is one of the easiest things you can make in your kitchen.

Simple Ingredients

Learn how to can your venison or beef here.
Sourcing Bones For Making This Bone Broth Recipe
Local Butcher
You can contact your local butcher and ask them to save you some bones. They may or may not charge you, depending on the butcher. Just ask them for soup bones, and they will know what you mean.
Save The Bones From A Beef
Whether you raise your own beef, or purchase a whole or half a beef from a farmer, you can have the soup bones saved when the meat is butchered. This is how I make a lot of broth at one time, because I usually have the bones from a whole beef, and that makes a lot of broth.

Save The Leftover Bones From Cooking
If you don’t have access to large amounts of bones for making broth, you can save the bones from making roasts or steaks. They won't have as much bone marrow or cartilage as some of the other bones, but they will still make decent broth.
Preserving Broth
To keep broth long term, you can freeze it or can it. I prefer to make it shelf stable by canning it, so it doesn’t take up valuable freezer space. Canning broth is simple. It must be pressure canned because it is a meat product, but you don’t have to pressure can it as long as you do meat, because it’s liquid and it doesn’t take long for it to get to a certain high temperature under pressure.

This post contains affiliate links, which means I make a small commission at no extra cost to you. See my full disclosure here

Tips
- Keep leftover veggie scraps in a bag in your freezer to add whenever you’re making broth. You can keep the peels and ends from the veggies, because you’re going to strain them off the broth in the end anyway. That way you’ll have zero waste on your veggies and your meat when you make broth.
- If freezing your broth, be sure to use a freezer safe container and leave room at the top of the container for the broth to expand as it freezes.
- Roast the bones in a 350 degree oven for 1 to 2 hours before adding them to the broth pot. This will caramelize them and give the broth the best flavor.
- To make instant pot bone broth, you can either turn your instant pot on the soup setting and let it simmer for a few hours, or you can turn it on high pressure and pressure cook everything for 90 minutes. This is just a faster way of extracting the nutrients from the bones, but keep in mind that some of the nutrients may be lost by being heated to such a high temperature.

FAQ
You should simmer broth for at least 12 hours to get the maximum benefits out of the bones, but you can leave it on a very low simmer for as long as you want, even several days. One of my favorite parts of making broth is that I can start it when I have time, and finish it when I have time. So if I get busy, I can just add more water to it and let it continue to simmer.
For the best beef bone broth, use a mix of bones that are rich in marrow and cartilage, like oxtail, beef shanks, knuckles, neck bones, and marrow bones; ideally, include a variety of cuts to maximize flavor and gelatin content.
Marrow bones:
These provide a rich, flavorful broth due to their high marrow content.
Cartilage-rich bones:
Bones like knuckles and oxtails contain a lot of cartilage, which contributes to the broth's gelatinous texture.
It doesn’t really matter whether you slow cook or pressure cook bone broth. Using a slow cooker or a pot on the stove is a great way to make the broth slowly, and pressure cooking it in an instant pot just speeds up the process. It’s really all up to your preference. The key is the cook the broth long enough that when it cools, it gels because it has gotten the gel into it from the bones.
Yes, it’s perfectly safe to can bone broth. Some of the health benefits might be lost during the pressure canning process and the broth doesn’t always gel after being canned because of the high heat. But canned bone broth is still way more nutritious for you, and cheaper than broth from the grocery store. If you’re wanting broth for medicinal purposes only, I would suggest freezing a small batch of it just for that.
Bone broth is full of vitamins, minerals, natural collagen, and amino acids. It has many health benefits making it a delicious choice, good for everyday consumption! You can drink a cup of this collagen-rich liquid everyday, and not have to take collagen supplements.
This is up to you. The fat is healthy and delicious, and adds extra flavor to the broth, so I always leave it on the broth. If you leave it on the broth, there will be a layer of fat on top of the broth once it is cold. You can just add it to your soups and stews right along with the broth, and you'll be getting all the gut health benefits from the collagen and marrow in the broth.
Canned bone broth will keep for at least 1-2 years on your pantry shelves. As long as the seals “pops” when you open it, the broth is still good. I have kept canned broth on my pantry shelves for much longer than 1-2 years and it’s always been fine. It’s important to do what you feel comfortable with, but as long as I can hear a nice “pop” when I open the jar, then I know it’s safe to consume.

How To Make Beef Bone Broth
Place bones onto a baking sheet and roast in a 350 degree oven for 1 to 2 hours until brown and caramelized. If you are using bones leftover from cooking you can skip this step.

To a large stockpot, slow cooker, roaster or instant pot add the roasted bones, herbs, veggie scraps, salt, pepper, vinegar and water.

Fill the pot with water, and bring to a low boil over medium heat.

Cover and simmer for a few hours or up to several days. You may need to add water occasionally if you simmer it for a long time.
Strain off the broth using fine cheesecloth and a colander.


Refrigerate for up to a week, or freeze in freezer safe containers for up to a year.
Pressure Canning Beef Bone Broth
Ladle hot broth into pint or quart jars, and cover with lids and rings.

Place 1-2 quarts of water in your pressure canner, place it on your stove and turn your burner on high. Place jars of meat into the canner and put the lid on, being sure to lock it into place. You can refer to your canner manual for detail instructions related to your canner.
Allow the canner to continue to heat until a steady stream of steam is coming out of the vents. (See video below)
Place pressure gauge or applicable device over steam vent.
When you reach 10 pounds pressure, lower the heat so that the pressure is maintained. You don’t want it to go too far above or below the desired pressure for best results. On my canner, it has a little pressure regulator that jiggles, so when it is put on the canner for 10 pounds of pressure, it is supposed to jiggle 4-5 times per minute. That is how I know it is at 10 pounds of pressure. This is very simple, but will vary from canner to canner, so please refer to your canner instructions for more details.
Process pints for 20 minutes and quarts for 25 minutes at 10 pounds pressure.
At the end of the processing time, simply turn off the heat and let the canner cool down slowly.
Once the canner is completely cooled, remove the lid and using the jar lifter, remove the jars and place them on a towel on your counter to cool.
Allow the jars to fully cool to room temperature. You will hear the satisfying “pop” of the seals as the jars cool. This means you’ve been successful!
Check The Seals
Once the jars are completely cooled, check to make sure they all have a good seal. To do this, you’ll want to make sure that the lid on each jar is indented downwards, and when you press on the center of the lid, it doesn’t move. If you use the For Jars lids, you won’t have any trouble with jars sealing. If you have a jar that doesn’t seal, you can put it into the refrigerator and use it within a week. Or you can replace the lid and re-process it in the canner. Sometimes a lid won’t seal if there is a small crack on the rim of the jar, or if a piece of salt or food particle wasn’t cleaned off the jar rim properly.
Wipe down your jars and put them on your pantry shelf to be enjoyed for a long time to come.
Thanks for following along as we teach you how to grow a simple, sustainable life.

How To Make Nourishing Beef Bone Broth
Equipment
- 1 Roasting pan
- 1 Large pot
- 1 slow cooker, roaster or instant pot
- 1 Crockpot or roaster liner, optional
- 1 Large colander or fine mesh strainer
- 1 Fine cheesecloth - for straining the broth
- 1 Canning Jars – I prefer to put all of my venison and beef in quart wide mouth jars for our larger family, but you can certainly use pint jars as well. You can find jars at garage sales and auctions, or you can purchase them from Azure Standard. If you use the code NEW15 at this link you will get 15% off your first order of $100 or more.
- 1 Lids and rings – I like the lids and rings from ForJarsUSA as they have the best seal rate of any lid I’ve ever tried. Use code wagon10 and get 10% your For Jars USA Order.
- 1 Jar Lifter – for taking hot jars out of the cannerTowel – for setting your hot jars on when placing them on the counter.
- 1 Pressure Canner – a really good pressure canner is a great initial investment in your canning future and one that will serve you well for many years to come. I prefer this All American pressure canner or the pressure canner from ForJarsUSA. Use code wagon10 and get 10% your For Jars USA Order.
Ingredients
- 2 to 3 pounds beef bones
- 1 large onion coarsely chopped
- 6 cloves garlic
- ¼ cup apple cider vinegar
- 2 Tbl dried rosemary
- 2 Tbl dried oregano
- 2 Tbl dried thyme
- 2 Tbl fine sea salt
- 10 Black peppercorns
- 3 bay leaves
- Other veggie scraps like carrots and celery (optional)
Instructions
- Place bones onto a baking sheet and roast in a 350 degree oven for 1 to 2 hours until brown and caramelized. If you are using bones leftover from cooking you can skip this step.
- To a large stockpot, slow cooker, roaster or instant pot add the roasted bones, herbs, veggie scraps, salt, pepper, vinegar and water.
- Fill the pot with water, and bring to a low boil over medium heat.
- Cover and simmer for a few hours or up to several days. You may need to add water occasionally if you simmer it for a long time.
- Strain off the broth using fine cheesecloth and a colander.
- Refrigerate for up to a week, or freeze in freezer safe containers for up to a year.
Pressure Canning Beef Bone Broth
- Ladle hot broth into pint or quart jars, and cover with lids and rings.
- Place 1-2 quarts of water in your pressure canner, place it on your stove and turn your burner on high. Place jars of meat into the canner and put the lid on, being sure to lock it into place. You can refer to your canner manual for detail instructions related to your canner.
- Allow the canner to continue to heat until a steady stream of steam is coming out of the vents. (See video below)
- Place pressure gauge or applicable device over steam vent.
- When you reach 10 pounds pressure, lower the heat so that the pressure is maintained. You don’t want it to go too far above or below the desired pressure for best results. On my canner, it has a little pressure regulator that jiggles, so when it is put on the canner for 10 pounds of pressure, it is supposed to jiggle 4-5 times per minute. That is how I know it is at 10 pounds of pressure. This is very simple, but will vary from canner to canner, so please refer to your canner instructions for more details.
- Process pints for 20 minutes and quarts for 25 minutes at 10 pounds pressure.
- At the end of the processing time, simply turn off the heat and let the canner cool down slowly.
- Once the canner is completely cooled, remove the lid and using the jar lifter, remove the jars and place them on a towel on your counter to cool.
- Allow the jars to fully cool to room temperature. You will hear the satisfying “pop” of the seals as the jars cool. This means you’ve been successful!
Check The Seals
- Once the jars are completely cooled, check to make sure they all have a good seal. To do this, you’ll want to make sure that the lid on each jar is indented downwards, and when you press on the center of the lid, it doesn’t move. If you use the For Jars lids, you won’t have any trouble with jars sealing. If you have a jar that doesn’t seal, you can put it into the refrigerator and use it within a week. Or you can replace the lid and re-process it in the canner. Sometimes a lid won’t seal if there is a small crack on the rim of the jar, or if a piece of salt or food particle wasn’t cleaned off the jar rim properly.
- Wipe down your jars and put them on your pantry shelf to be enjoyed for a long time to come.
Video
Notes
- Keep leftover veggie scraps in a bag in your freezer to add whenever you’re making broth. You can keep the peels and ends from the veggies, because you’re going to strain them off the broth in the end anyway. That way you’ll have zero waste on your veggies and your meat when you make broth.
- If freezing your broth, be sure to use a freezer safe container and leave room at the top of the container for the broth to expand as it freezes.
- Roast the bones in a 350 degree oven for 1 to 2 hours before adding them to the broth pot. This will caramelize them and give the broth the best flavor.


So easy
how much water?
You can add as much water as is needed to fill the pot and the bones will turn all of it into broth, and the longer you cook it the better and more flavorful the broth will be. As a general rule you can use about 2 quarts of water for each pound of bones. Let me know if you have any other questions!
Can't wait to try making this!